Installation
↑ Back to top- Download the .zip file from your WooCommerce account.
- Go to: WordPress Admin > Plugins > Add New to upload the file you downloaded.
- Activate the extension.
- Global attributes are available for your whole store
- Per product attributes are only available for 1 product
Set up colors and photos for global attributes
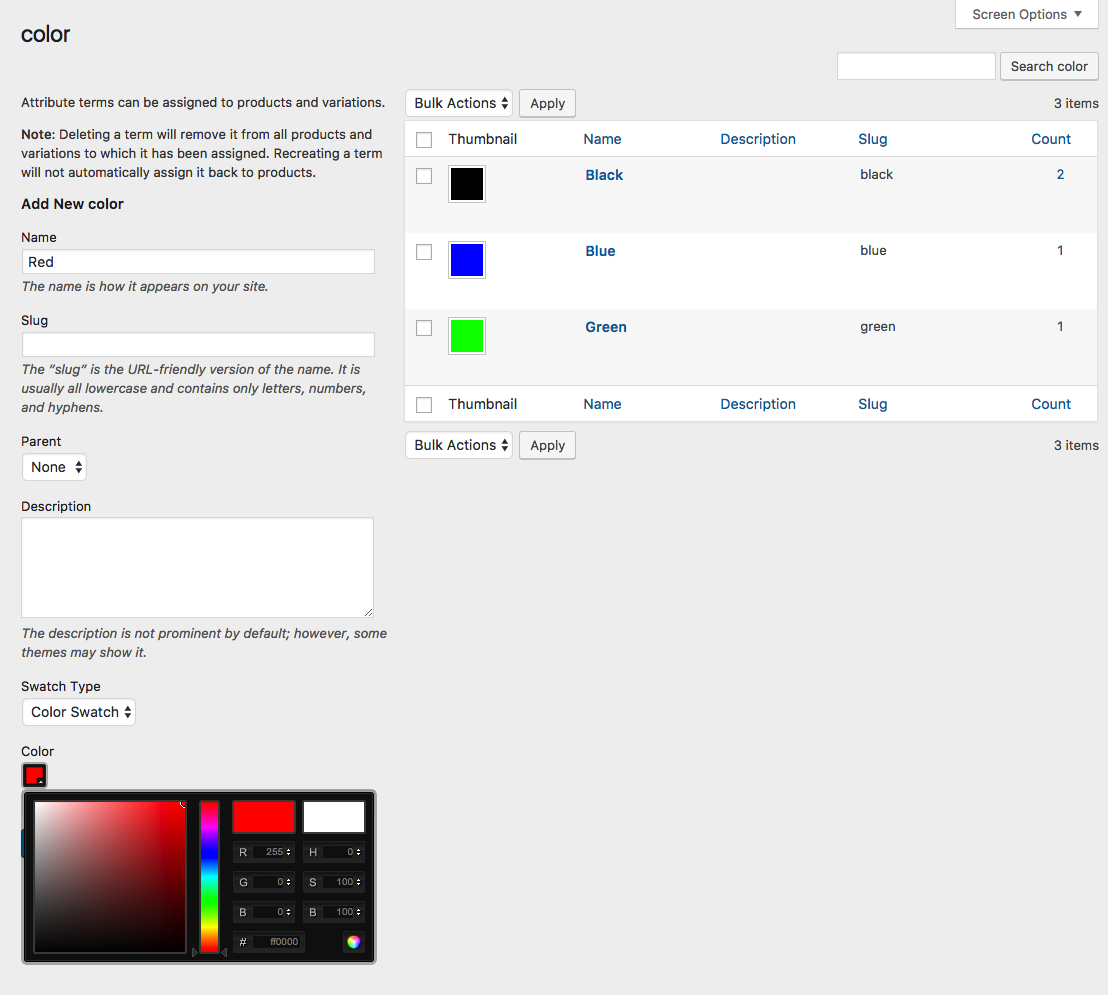
↑ Back to top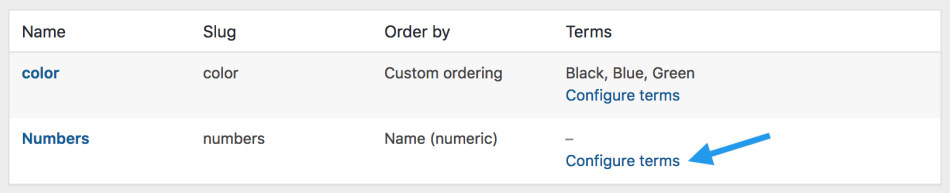 4. Add New Color or whatever your attribute is called (or choose to edit an existing term).
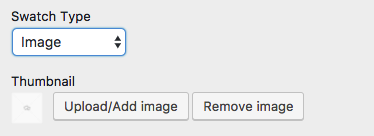
5. Select either “Color” or “Image” in the Swatch Type dropdown.
4. Add New Color or whatever your attribute is called (or choose to edit an existing term).
5. Select either “Color” or “Image” in the Swatch Type dropdown.
- If you’ve chosen color, you’ll be able to click on the color icon and select the color you want to use in the color picker. Alternatively, you can type in the HEX value for the color.
- If you’ve chosen image, you’ll be able to upload an image.
Warning: If you change the attribute name and/or slug you permanently lose the swatches configuration.
Add color and image swatches to variable products
↑ Back to topVariable Product2. Publish your product. 3. Go to the Swatches tab. 4. Select a “Type” for each of the attributes used for the variations.
- None. The options will be offered in a dropdown.
- Taxonomy Colors and Images. The options of the global attribute will be offered. (Only available for global attributes.)
- Custom Colors and Images. You will be able to add colors and image swatches.
- Radio Buttons. The available options will be displayed as radio buttons.
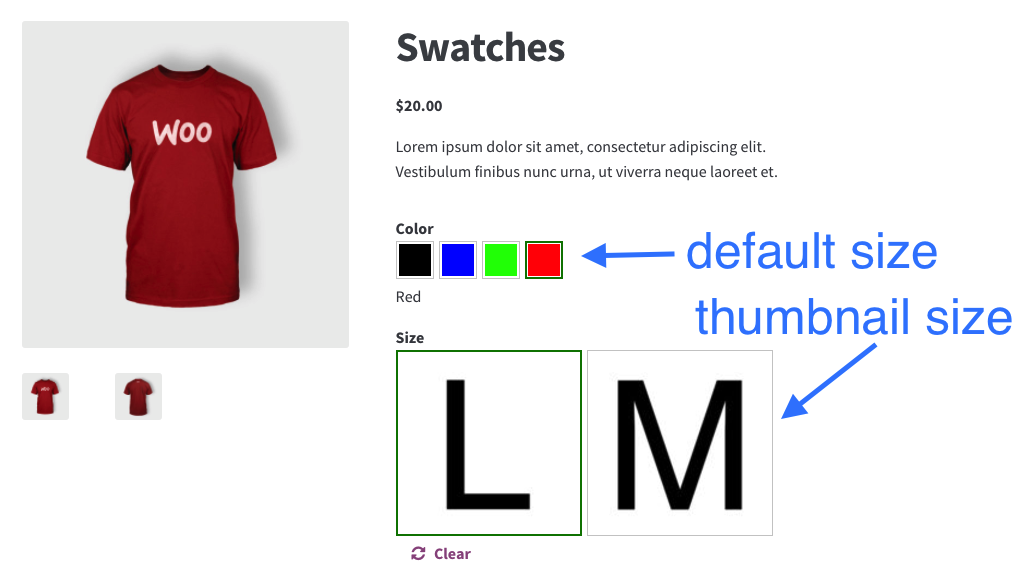
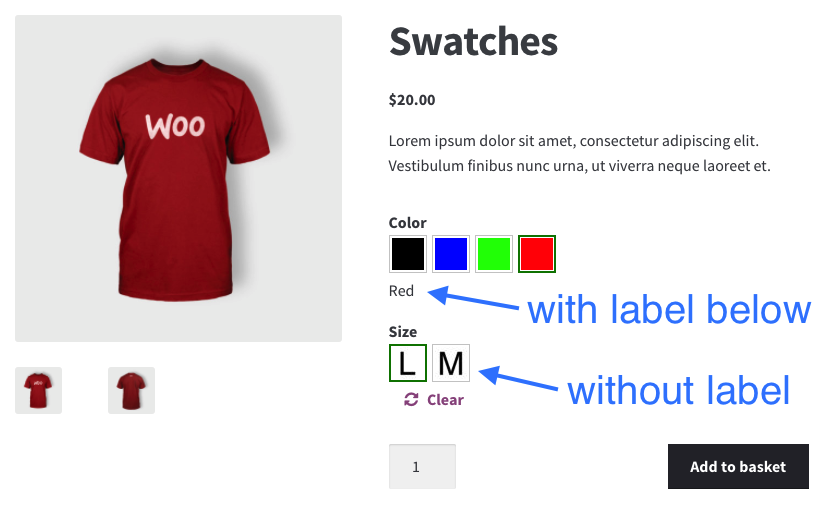 6. Select the size of the swatches if you’ve selected “Custom Colors and Images”. This will determine how large the swatches will be on the product page.
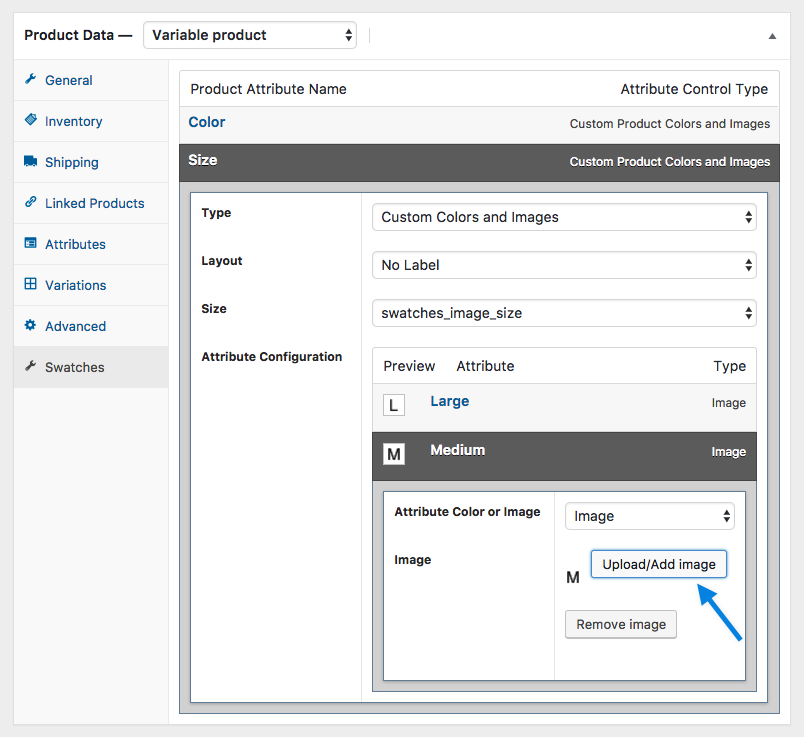
 7. Configure the attribute terms. This is similar to how global attribute terms are configured (see above).
- Select the term.
- Choose Attribute Color or Image.
- If you’ve chosen color, select a color.
- If you’ve chosen image, upload an image.
 8. Update the product.
Compatibility with other extensions
↑ Back to top- The CSV Import suite currently does not have the ability to import swatch settings.
- Grouped Products are not currently compatible or supported.
FAQs
↑ Back to topHow do I change the size of the image swatches?
↑ Back to top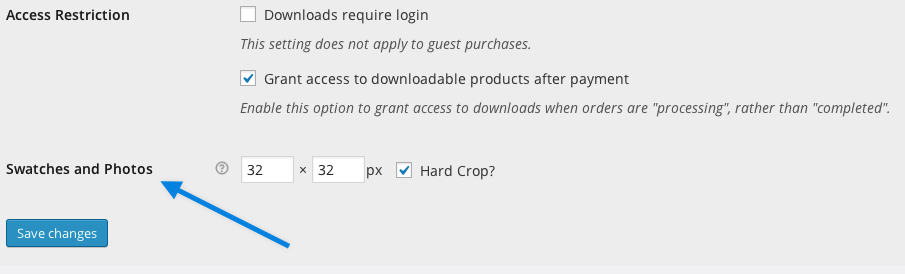 After changing the size, you need to regenerate your images by using the AJAX thumbnail rebuild plugin.
Where do I put my template files?
↑ Back to top/yourtheme/woocommerce-swatches/single-product/variable.php.
Note: Since version 2.0, template overrides are no longer available. Instead, you will need to hook into the filters available in the woocommerce-swatches-template-functions.php file.
Why is the main picture of my product not changing while selecting variations?
↑ Back to topWhy are my swatches not saving?
↑ Back to topmax_input_vars. This happens frequently, if you have a product with a lot of variations.