Requirements
↑ Back to topNew Zealand Post is a premium shipping method which lets you get shipping rates from the New Zealand Post API. It makes shipping calculations for your product and ordrs effortless.
Because of the NZ Post API, using the Plugin requires that your store uses NZ Dollars for it’s currency and a base country of New Zealand.
The extension primarily works with mm and kgs, but other units can be converted automatically. This extension can calculate quotes worldwide as it handles both domestic and international parcels.
Installation
↑ Back to top- Upload the plugin folder to the ‘/wp-content/plugins/’ directory.
- Activate the plugin through the ‘Plugins’ menu in WordPress.
- Thats it – you can now configure the plugin.
API & Debug
The plugin requires an NZ Post API Credentials and other supporting information. This varies on the API you are using.
To get started you will need to configure the API to access your specific NZ post account. To access the plugin settings go to: WooCommerce > Settings > Shipping > New Zealand Post. Next, select API Type from NZ Post API Type drop-down.
We recommend using Shipping Option V2 API since it is the latest version of New Zealand Post API.
Here is the process to integrate with the ShippingOptionsV2 API. For ShippingOptions(V1) and RateFinder API, see below.
Shipping Option V2 API
To use the ShippingOptions V2 API with the NZ Post Plugin you require the following information:
- NZ Post Account Number
- NZ Post Site Code
Both the NZ Post Account Number and Site code can be obtained by contacting NZ Post. On the plugin settings page you will see NZ Post Account Number and Site code – Enter your NZ Post account number or (TPID) and NZ Post Site Code .
Other options on the settings table:
- Enable auto-generate Shipping Options Label – Enable to generate shipping labels on checkout
- Enable Sandbox Mode – Enable Sandbox for API testing
- Debug Mode – Enabling this will show you debugging information on your cart and checkout pages.
- Domestic shipping surcharge – Add surcharge amount per order if any.
- International shipping surcharge – Add surcharge amount per order if any
- Save Changes – Click Save changes to store settings. Always store settings after making any change.
Configuration
↑ Back to top- Go to: WooCommerce > Settings > Shipping. We want to add a shipping Method.
- Select your Shipping Zone that you want to add the method to, and press the Add shipping method + button on the right

- Select New Zealand Post from the dropdown and press Add shipping method:

- Click on the New Zealand Post method to configure the settings:
- Method Title – Name the shipping method. This will be visible by customers.
- Origin Postcode – This should be set to the postcode from which you will ship. It is sent to the NZ Post API. It should match with the Postcode / Zip specified in WooCommerce => Settings => Gereral => Store Address.
- Method Availability – This setting lets you narrow down the countries which can get quotes. Leave set to All Countries to have it available for all customers.
- Rates and Services – These settings control the services and rates you offer customers.
- Parcel Packing Method – See below.
- Offer Rates – Choose to return all available NZ rates and options (user will get the choice) or just return a single, cheapest shipping rate.
- Services – Here you can rename, and re-order, NZ Post shipping rates.
Parcel Packing Method
↑ Back to topThere are 2 packing methods with NZ Post; each affects the parcels you send to the API. This determines if the rate is calculated based on each items dimensions or packed in to a predefined box and rate.
Pack items individually (Default)
↑ Back to topEach item in your cart (non virtual) will be sent to the NZ Post API. Quotes for all items will be combined for the final cost.
Pack into boxes with weights and dimensions (Recommended)
↑ Back to topItems will be packed into pre-defined boxes and sent to the API. We recommend this option. See box-packing below for more information on this.
Box-Packing
↑ Back to topThe box packer included with this shipping method lets you group items into packages of which you define the height, width, length, weight and max-weight.
The packing is mainly volume based, but does also consider item sizes too.
Setting up box sizes
↑ Back to topWithin the settings, look for the boxes setting. Click ‘add box’ to set up the boxes dimensions:
- Outer dimensions are used for parcel dimensions and are passed to the API.
- Inner dimensions are used for packing, and items will be fit within these.
- Box weight is the weight of the actual box, and will be added to the weight of the contents.
- Max weight is the maximum weight your box can hold. This includes contents weight and box weight.

How the calculation works
↑ Back to topThe packer does the following:
- Finds boxes which fit the items being packed (uses H x W x D).
- Packs all fitting items into boxes (using volume).
- The largest box which fits 100% of items is used *or* use the highest % packed box, and then pass unpacked items back (and repeat the process)
- Unpackable items are packed alone, using the item dimensions.
- All packed boxes are returned.
Customer Usage
↑ Back to topCustomers will get quotes (after inputting their address) from two places;
- The cart page – by using the shipping calculator
- The checkout page – by filling in the shipping and billing forms
Troubleshooting
↑ Back to topNo rates returned/no rates available
↑ Back to top- Enable debug mode to see debugging information on the cart page. This will often reveal the problem.
- Check your products have sizes and weights set – without this the calculation cannot be performed.
- Check your store’s base country is New Zealand and that you are using NZ Dollars (from WooCommerce > Settings > General).
- The store address specified in general WooCommerce setting is an important part that affects several WooCommerce features, so it should be mentioned correctly. The user should also make sure that their store address is available in NZ Post API database. If not, then they must request to get their store address added into NZ Post API database.
- The plugin works correctly when both the store address and buyers shipping address details match an address within the NZ Post address database. However, when the address does not exist in the NZ Post database, or the address is entered in the wrong format, the plugin does not work.
If the buyer finds that shipping options are not coming up, then he can directly search his shipping address on NZ Post address locator here: https://www.nzpost.co.nz/tools/postshop-kiwibank-locator/. Then, they can retry and specify exactly as its appearing in the address locator search result. - The plugin needs to be able to talk to NZ Post API. For this it uses wp_remote_post which makes use of fsockopen/CURL.
Questions and Support
↑ Back to topHave a question before you buy? Please fill out this pre-sales form.
Already purchased and need some assistance? Get in touch with the developer via the Help Desk.
Working with Legacy APIs: ShippingOptions and RateFinder:
RateFinder API
- API Key – NZ Post will provide you with an API key after you signup for their API services. Enter this here – it is required.
- Debug Mode – Tick the checkbox to log API requests and responses for the cart and checkout pages. Useful for troubleshooting.
- Domestic shipping surcharge – Add surcharge amount per order if any.
- International shipping surcharge – Add surcharge amount per order if any.
- Click Save changes to store settings
Shipping Option API
↑ Back to topThis Shipping option is for existing customers of NZ Post with active API Access:
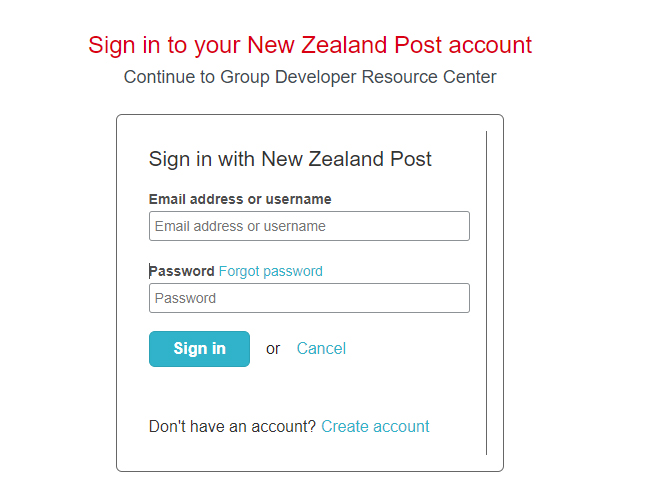
- Signin to your account Developer Resource Center here
- Click Public portal and you’ll be redirected to another page.
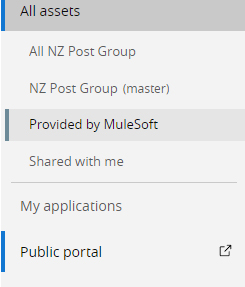
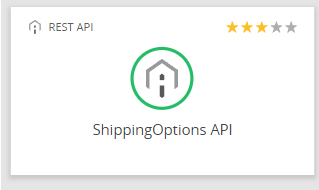
- Navigate to Shipping Options API or search for ShippingOptions API in the search bar and click on it
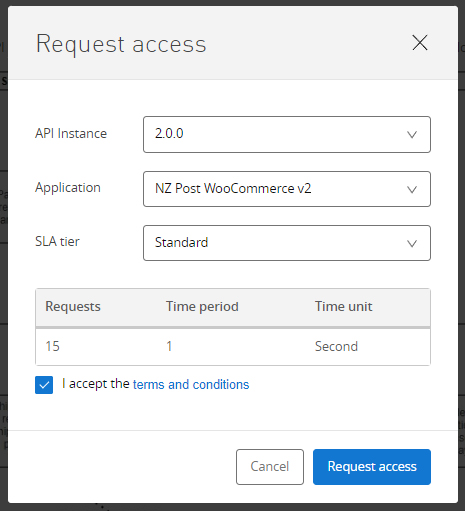
- On the top right corner, click on Request access button.

- Select Production version from API instance and Standard in SLA tier.
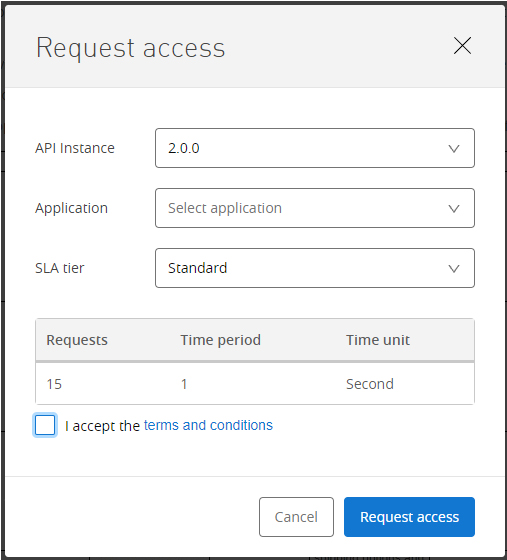
- Read and accept Terms and Conditions.
- Now go to the Application drop-down field and follow these steps.
Creating New Application
↑ Back to top- In Application field, click create a new application.
- Enter any name for your application.
- Select the following
- Resource Owner Grant
- Client Credentials Grant
- Refresh Token and Automatically register the URIs for API Notebook and API Console
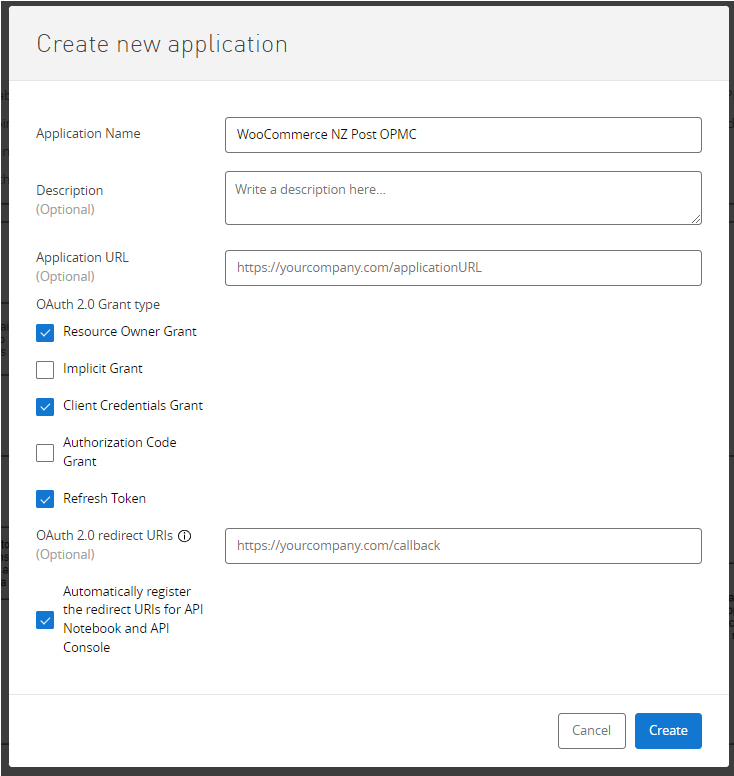
- And click create.
- You’ll come back to the previous popup and now click Request Access.
- You’ll get a notification message in your email and also in the application tab here from NZ Post.
- Click the name of your Application.
- Now, you can see Client ID and Client Secret in this tab.
Adding credentials to Shipping Option API
Client ID – Copy and paste Client ID from the application you have created.
Client Secret – Available in application also copy and paste from there.
Username – Enter username or email address of your NZ Post account
NZ Post Account Number and Site code – Enter your NZ Post account number or (TPID) and NZ Post Site Code provided by New Zealand Post. If you doesn’t have it, please call the NZ POST National Call Center for assistance with query on – 0800 501 501
or email NZ Post Sales leads – leads@nzpost.co.nz
Enable auto-generate Shipping Options Label – Enable to generate shipping labels on checkout
Enable Sandbox Mode – Enable Sandbox for API testing
Debug Mode – Enabling this will show you debugging information on your cart and checkout pages.
Domestic shipping surcharge – Add surcharge amount per order if any.
International shipping surcharge – Add surcharge amount per order if any
Save Changes – Click Save changes to store settings. Always store settings after making any change.
- Upload the plugin folder to the ‘/wp-content/plugins/’ directory.
- Activate the plugin through the ‘Plugins’ menu in WordPress.
- Thats it – you can now configure the plugin.