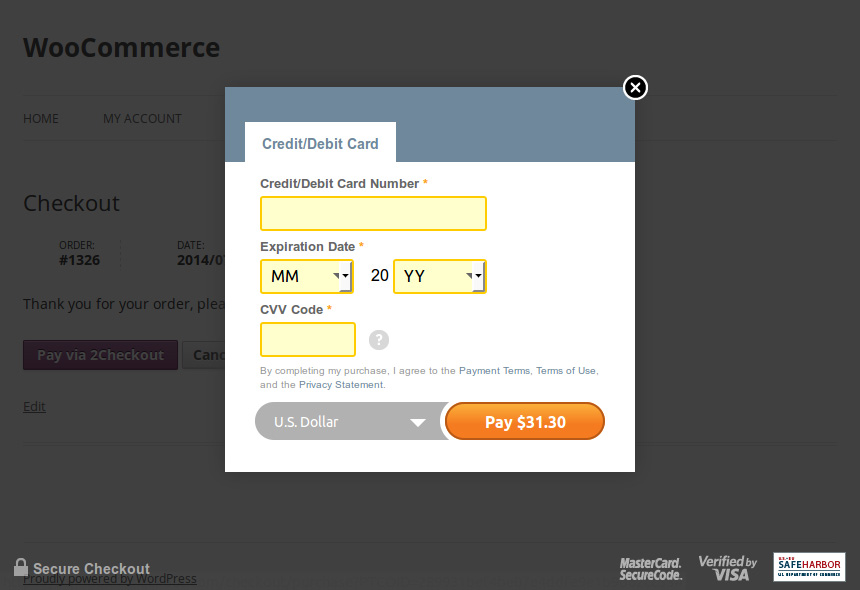
2Checkout Inline Checkout creates an iFrame checkout option that displays a secure payment form inside your WooCommerce store and allows you to process transactions from 196 countries using 26 currencies and 15 languages.
Note: This product is no longer for sale at WooCommerce.com. Documentation is not being updated.
Installation
↑ Back to top- Download the .zip file from your WooCommerce account.
- Go to: WordPress Admin > Plugins > Add New and Upload Plugin with the file you downloaded with Choose File.
- Install Now and Activate.
Requirements
↑ Back to top- A 2Checkout account – go to www.2checkout.com and Sign Up or Log In if you have an existing account
Sign up with 2Checkout
↑ Back to top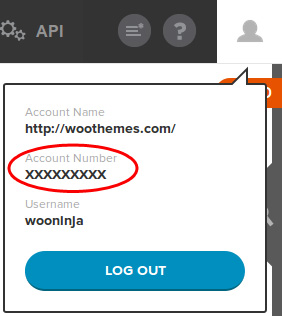
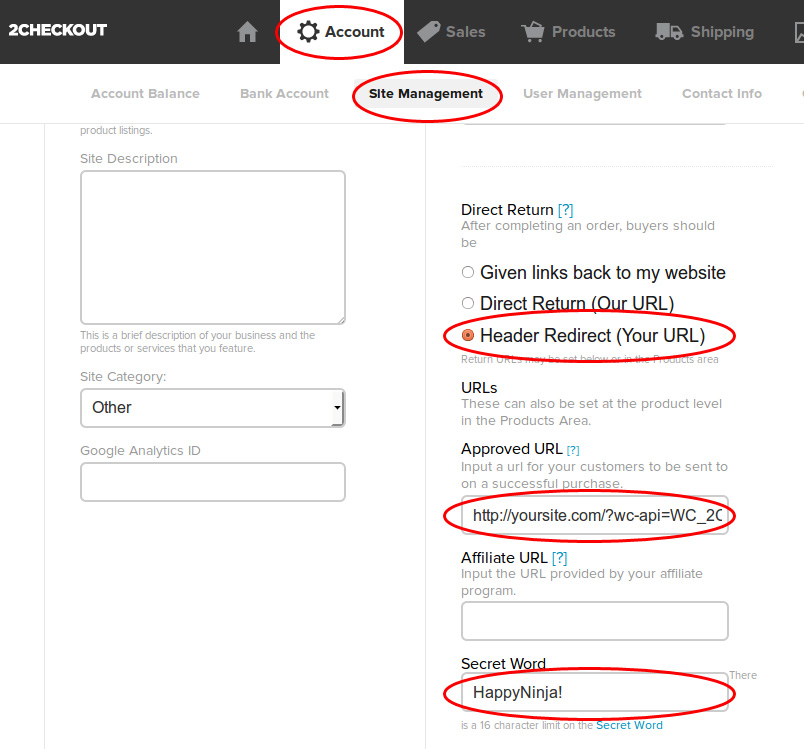
- Go to Account > Site Management.
- Set the Direct Return as Header Redirect (Your URL).
- Enter the Approved URL. For example:
http://yoursite.com/?wc-api=WC_2Checkout_Inline_Checkout_Gateway - Enter a strong Secret Word.
 Set up the Notification URL. Click the following button:
 Enable the Order Created, Fraud Status Changed, Invoice Status Changed and Refund Issued options and set the URLs. For example:
http://yoursite.com/?wc-api=WC_2Checkout_Inline_Checkout_Gateway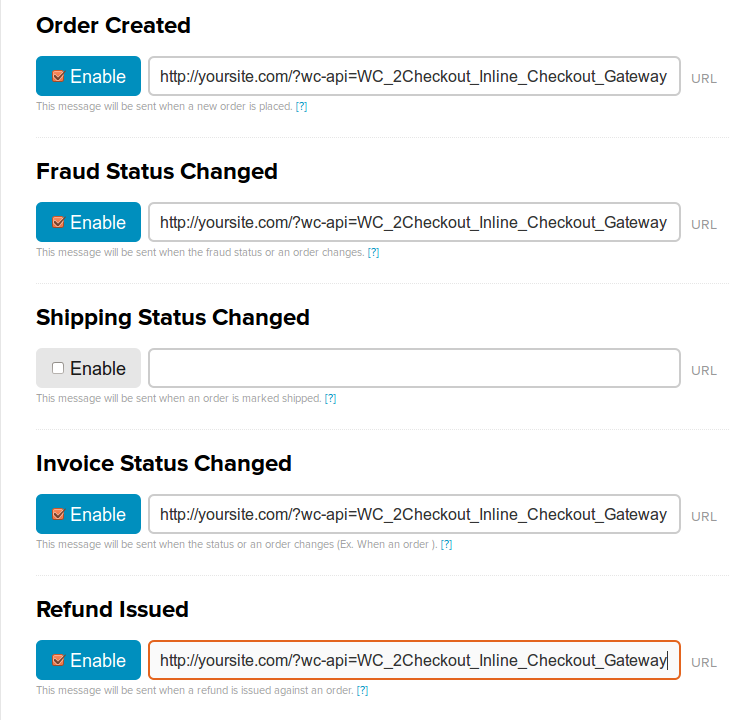
Setup and Configuration
↑ Back to top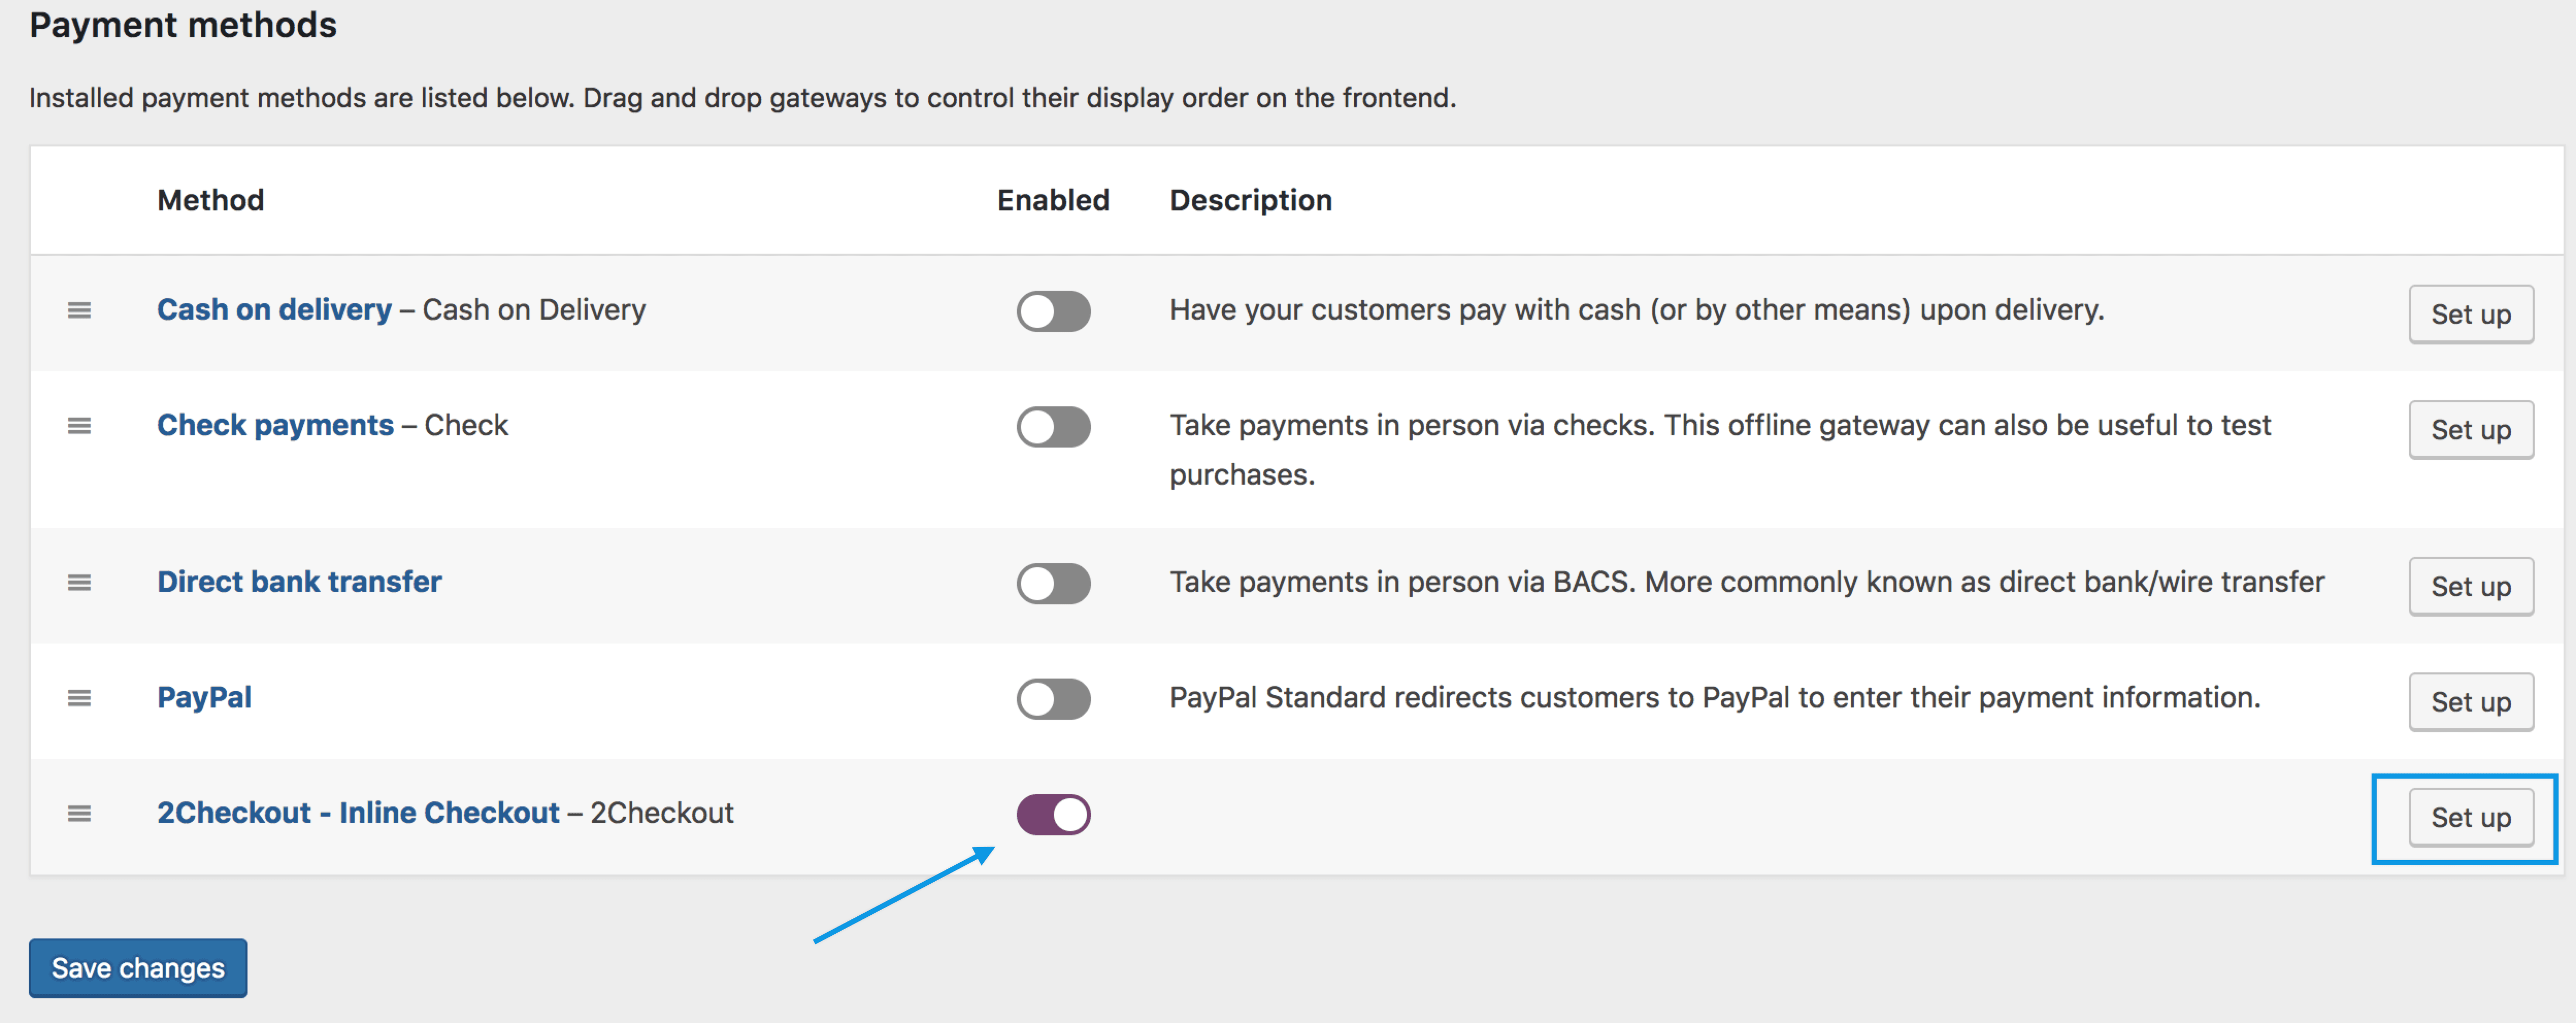
- Go to: WooCommerce > Settings > Payments. Note: ‘Payments’ formerly called ‘Checkout’ prior to WooCommerce 3.4.
- Use the toggle under Enabled to select 2Checkout Inline.
- Select Set Up. You are taken to the 2Checkout – Inline settings.
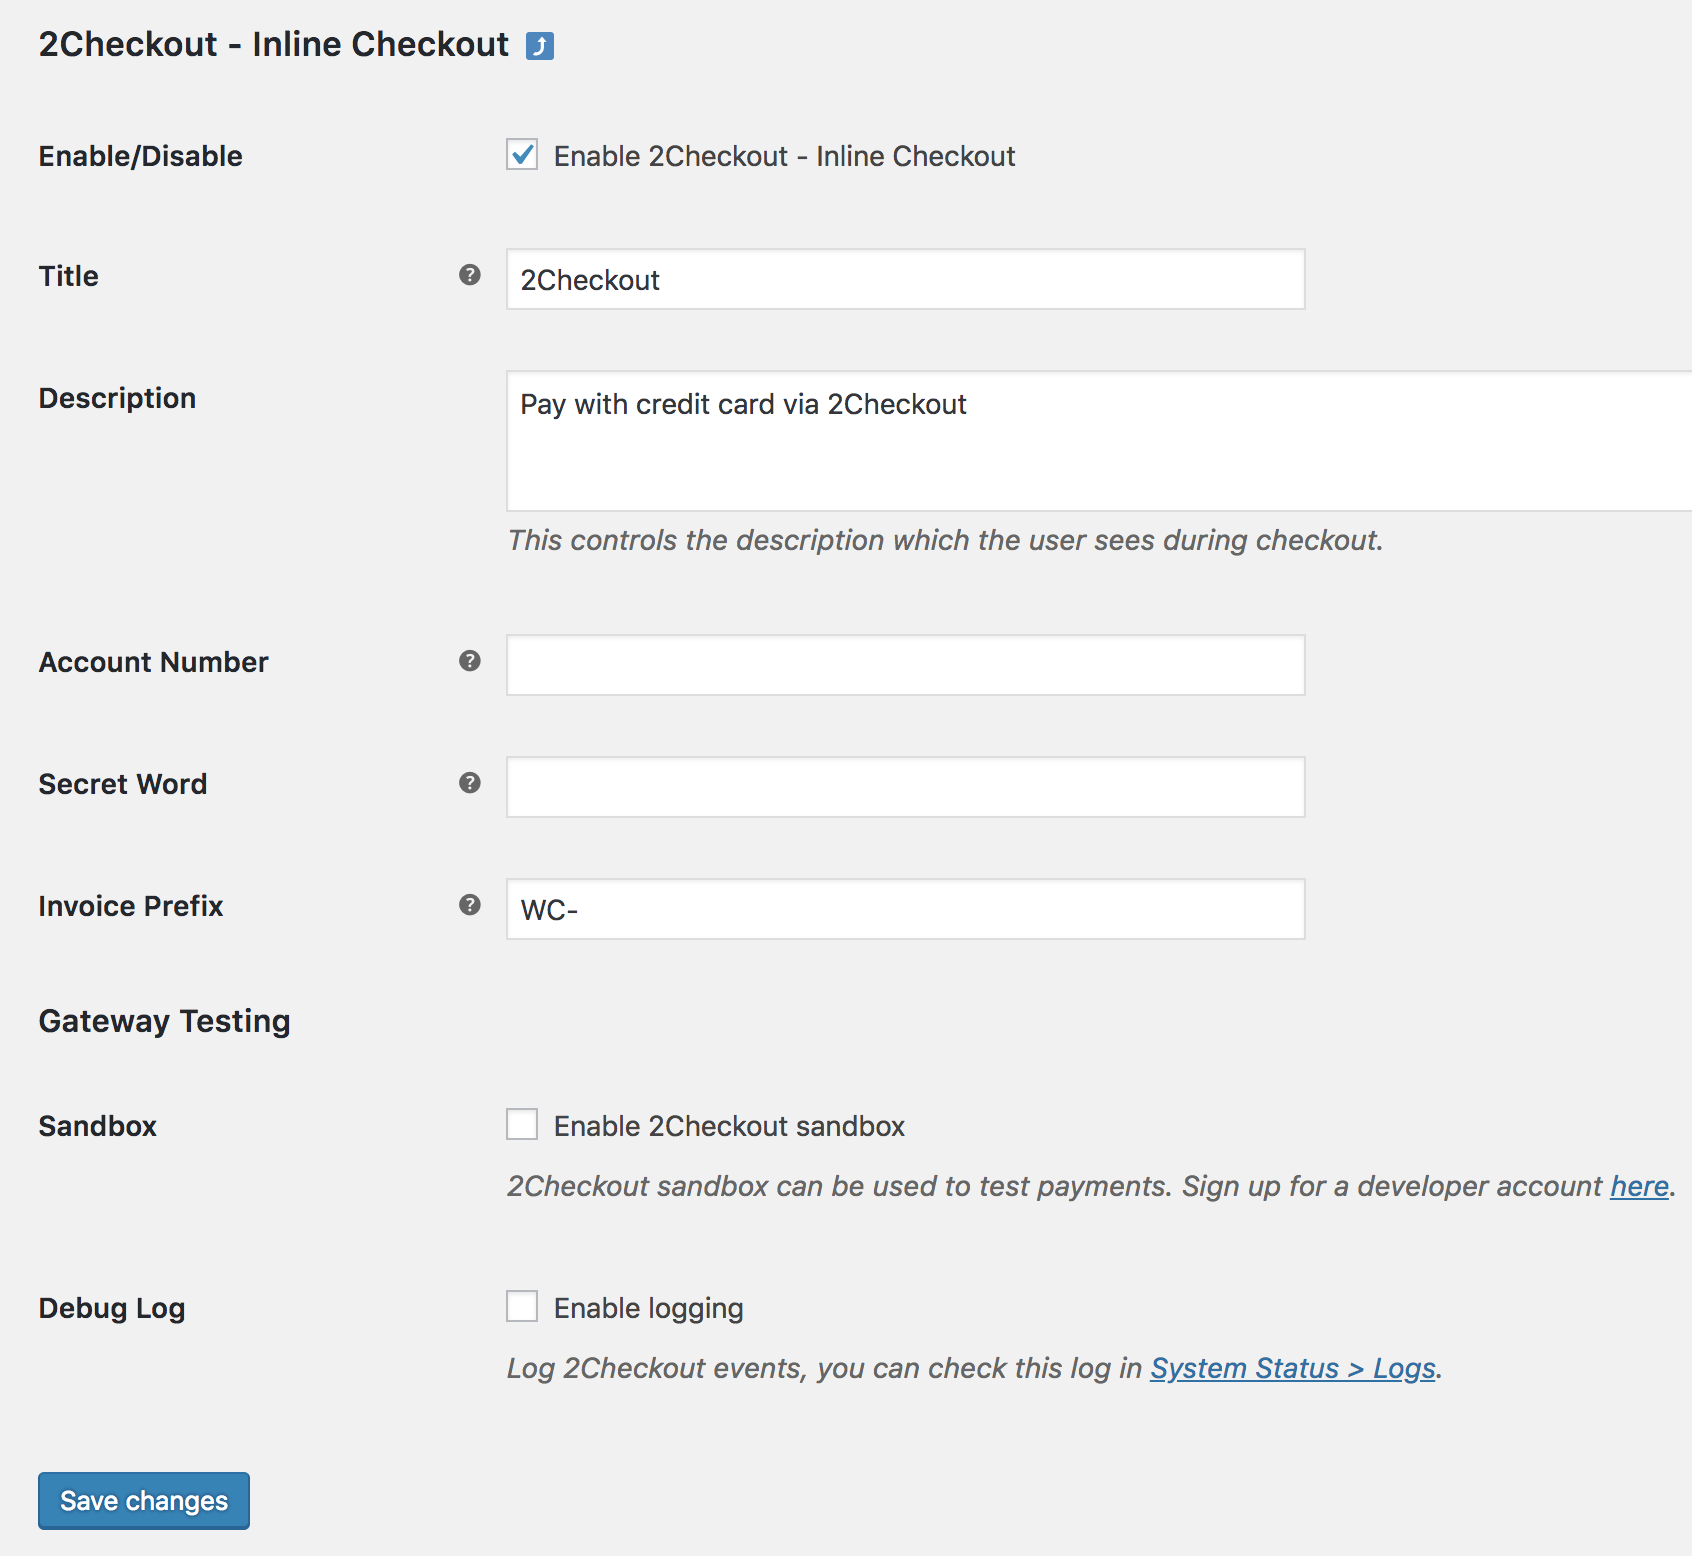
- Configure your settings:
- Enable/Disable – Enable to use. Disable to turn off.
- Title – Choose the title shown to customers during checkout
- Description – Add info shown to customers if they use 2Checkout – Inline
- Account Number and Secret Word – From your 2Checkout account
- Invoice Prefix – Useful if you run multiple stores/locations or need designation
- Gateway Testing
- Sandbox – Tick the box to enable Test mode. Untick to return to Live mode.
- Debug Log – Tick the box to enable logging for troubleshooting.
- Save changes.