Send personalized SMS notifications to WooCommerce customers when their order status changes and one-time custom messages, plus receive SMS updates when customers place orders. Clickatell has worldwide coverage, with 819 networks in more than 220 countries.
Note: This product is no longer for sale at WooCommerce.com. Documentation is not being updated. We recommend Twilio SMS Notifications as an alternative.
Requirements
↑ Back to topInstallation
↑ Back to top- Download the extension from your WooCommerce dashboard.
- Go to Plugins > Add New > Upload and select the ZIP file you just downloaded.
- Click Install Now, and then Activate.
Sign up for a Clickatell API Account
↑ Back to top- Go to Clickatell, and sign up.
- Log into the Clickatell website through the Platform log in.
- From your dashboard, select “SMS Notifications” in the sidebar. This will then take you to a list of all of your active integrations.
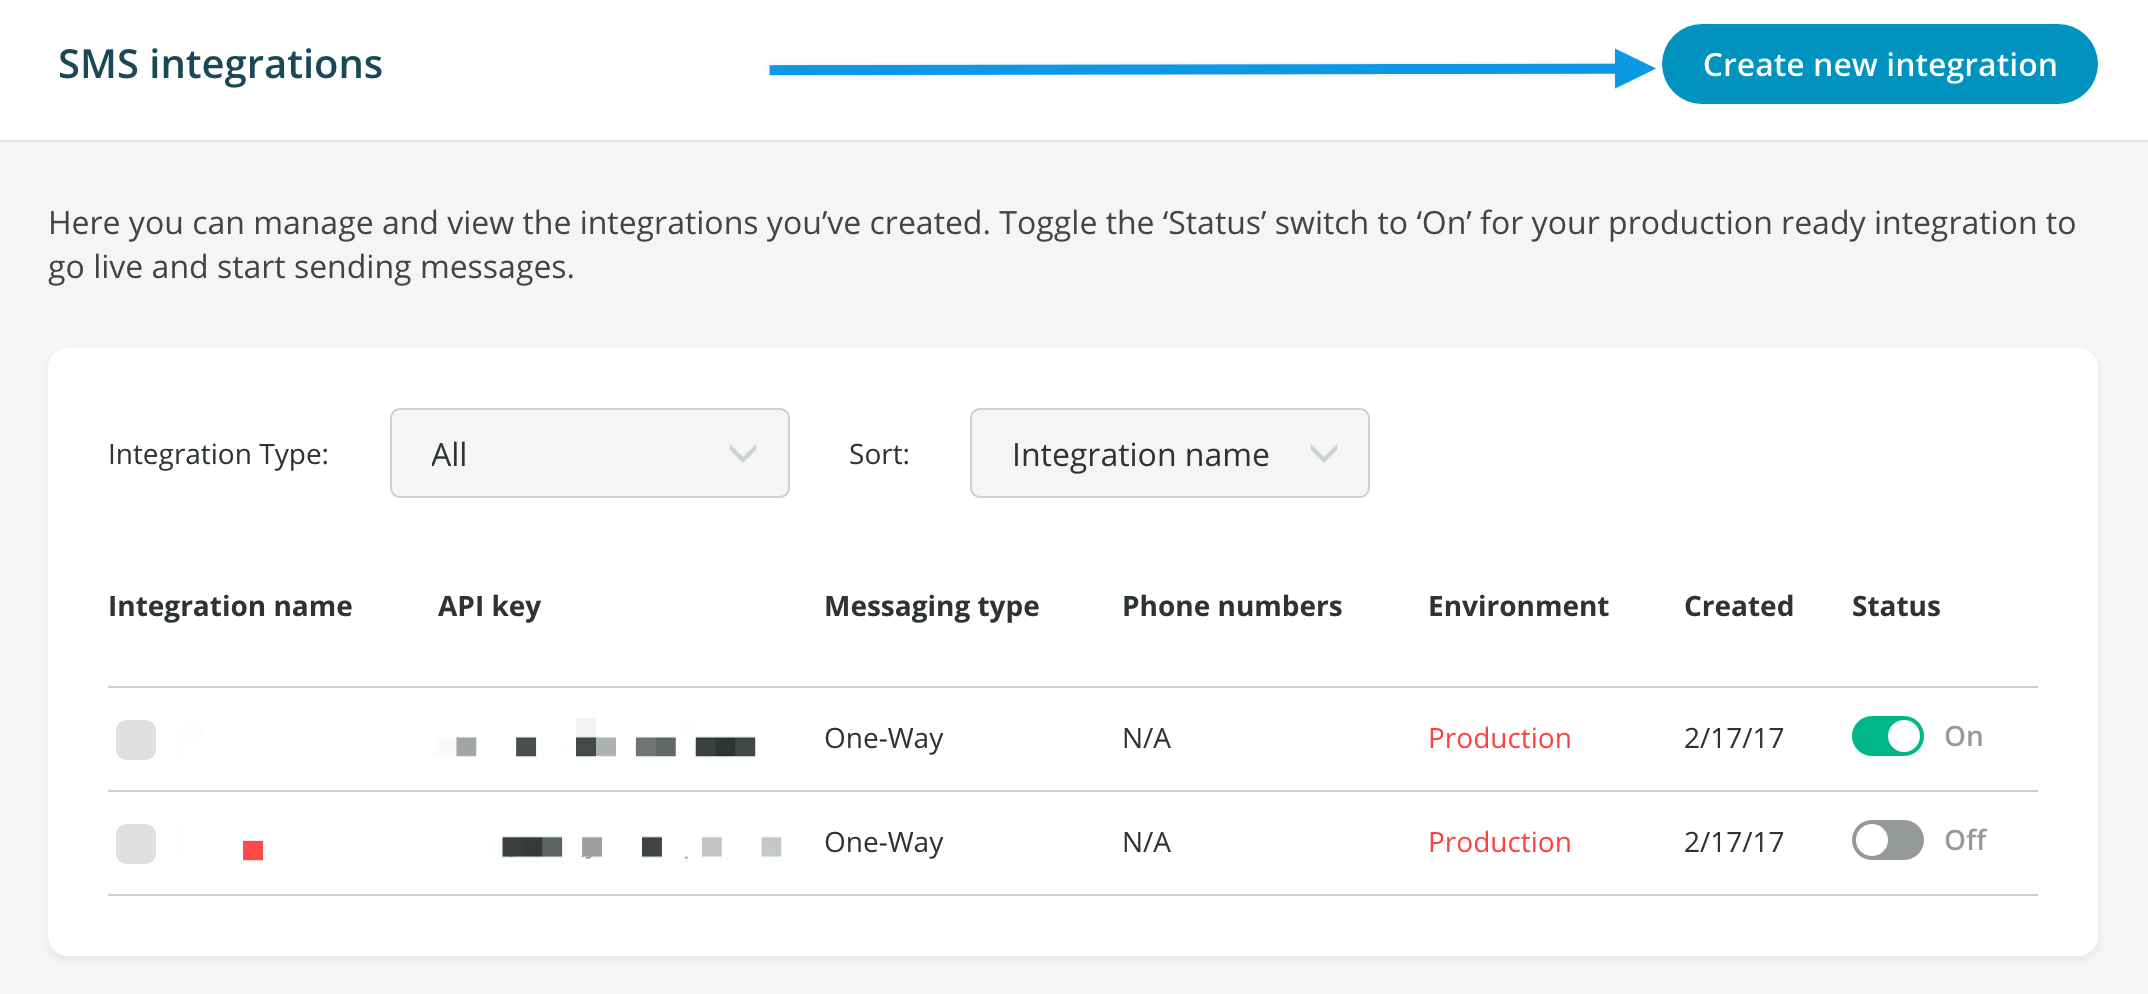
- Select “Create New Integration”. This will bring up a step-by-step wizard for creating an API key.
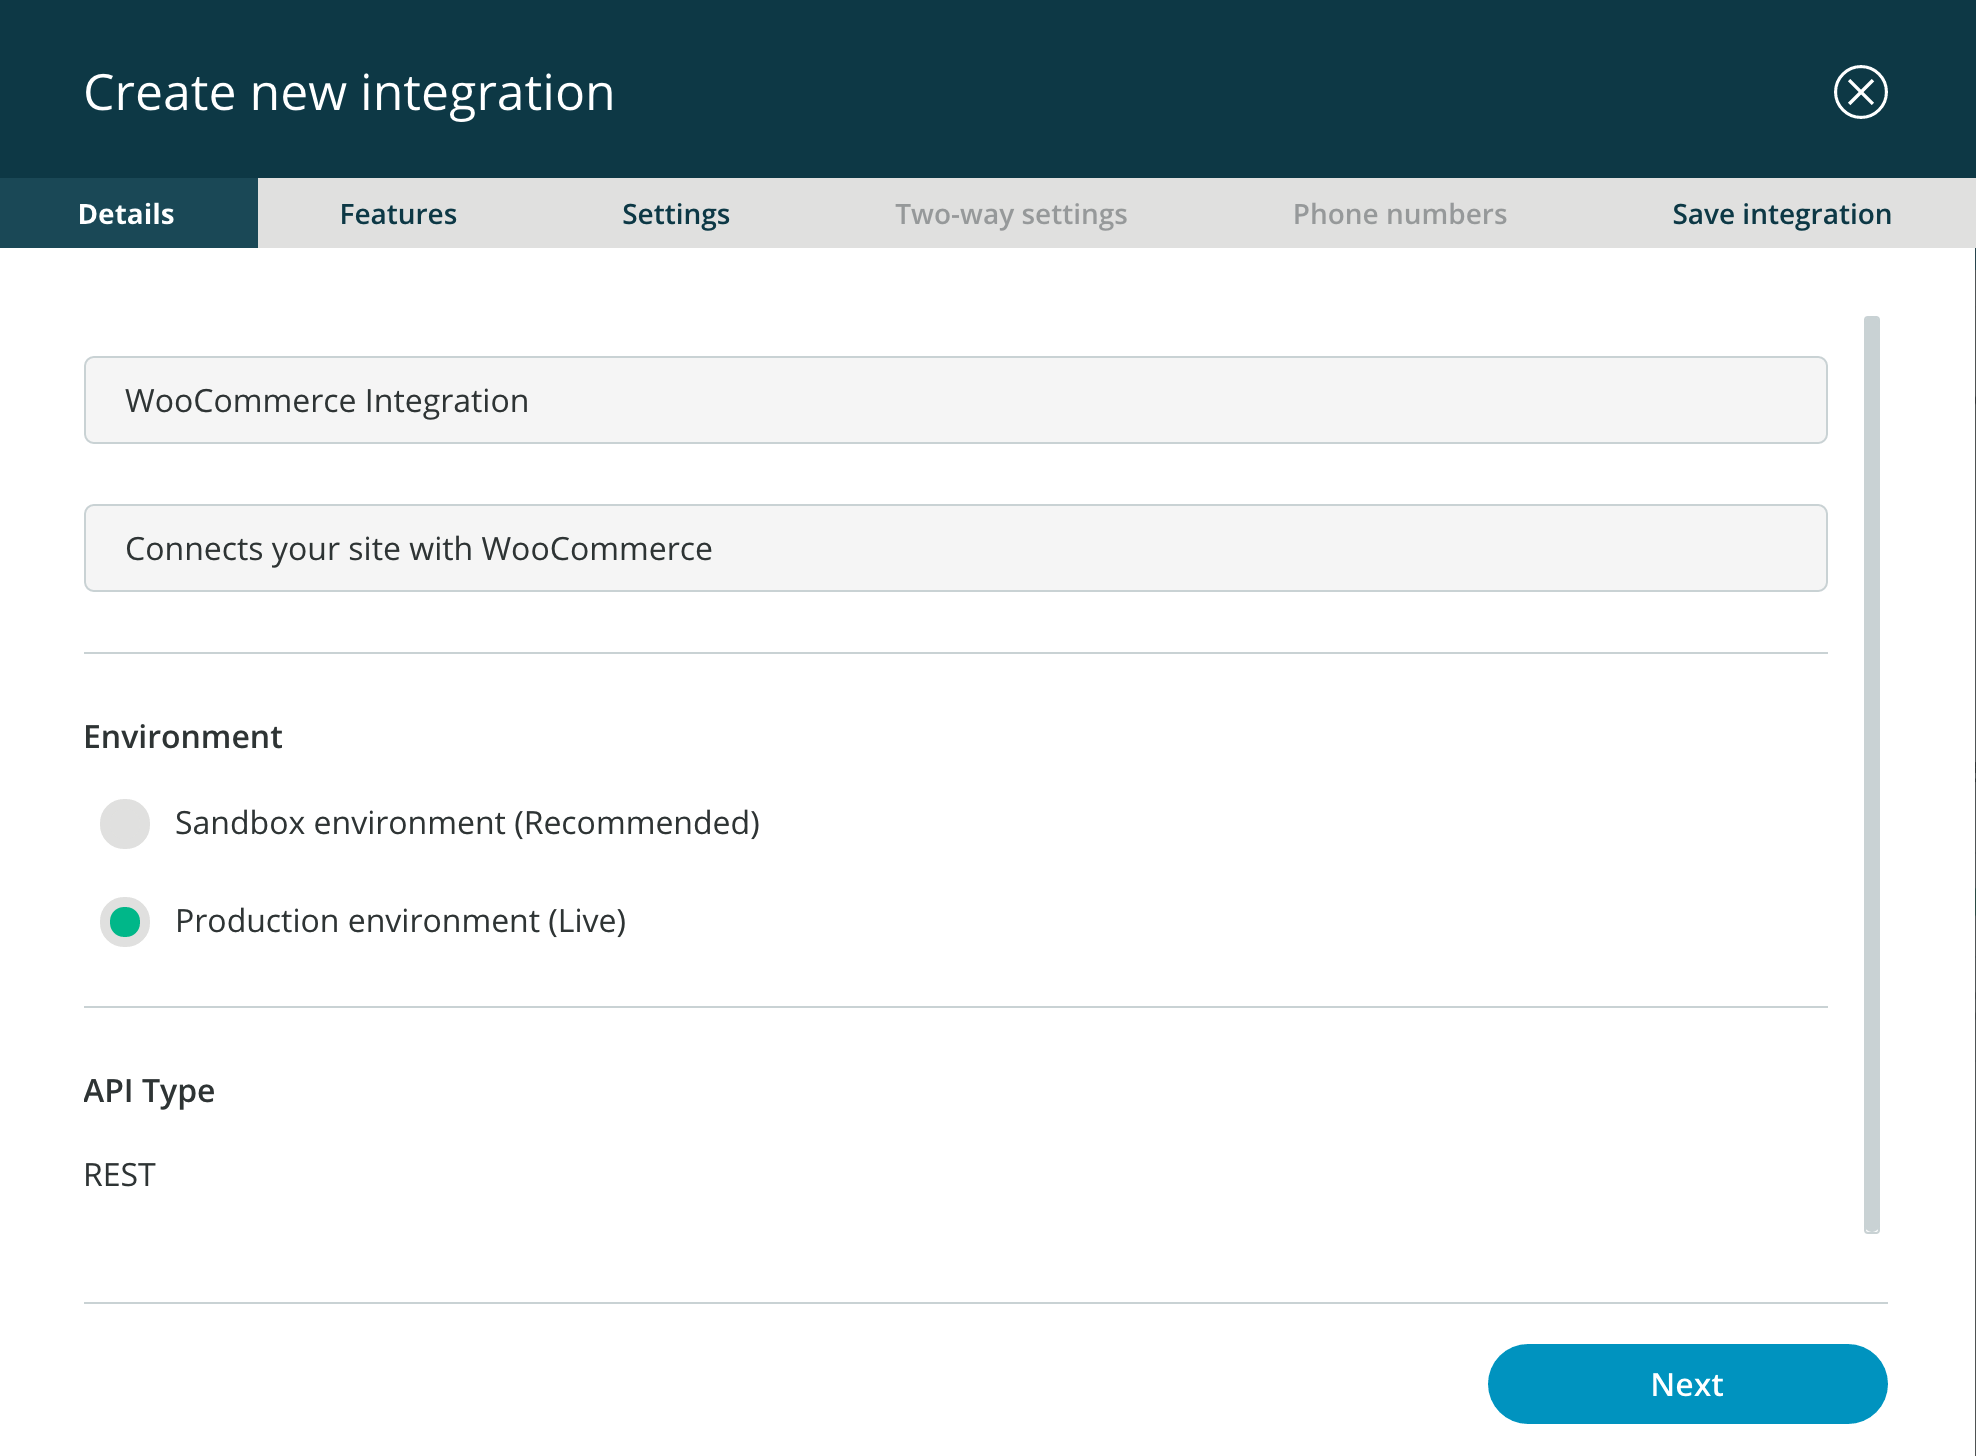
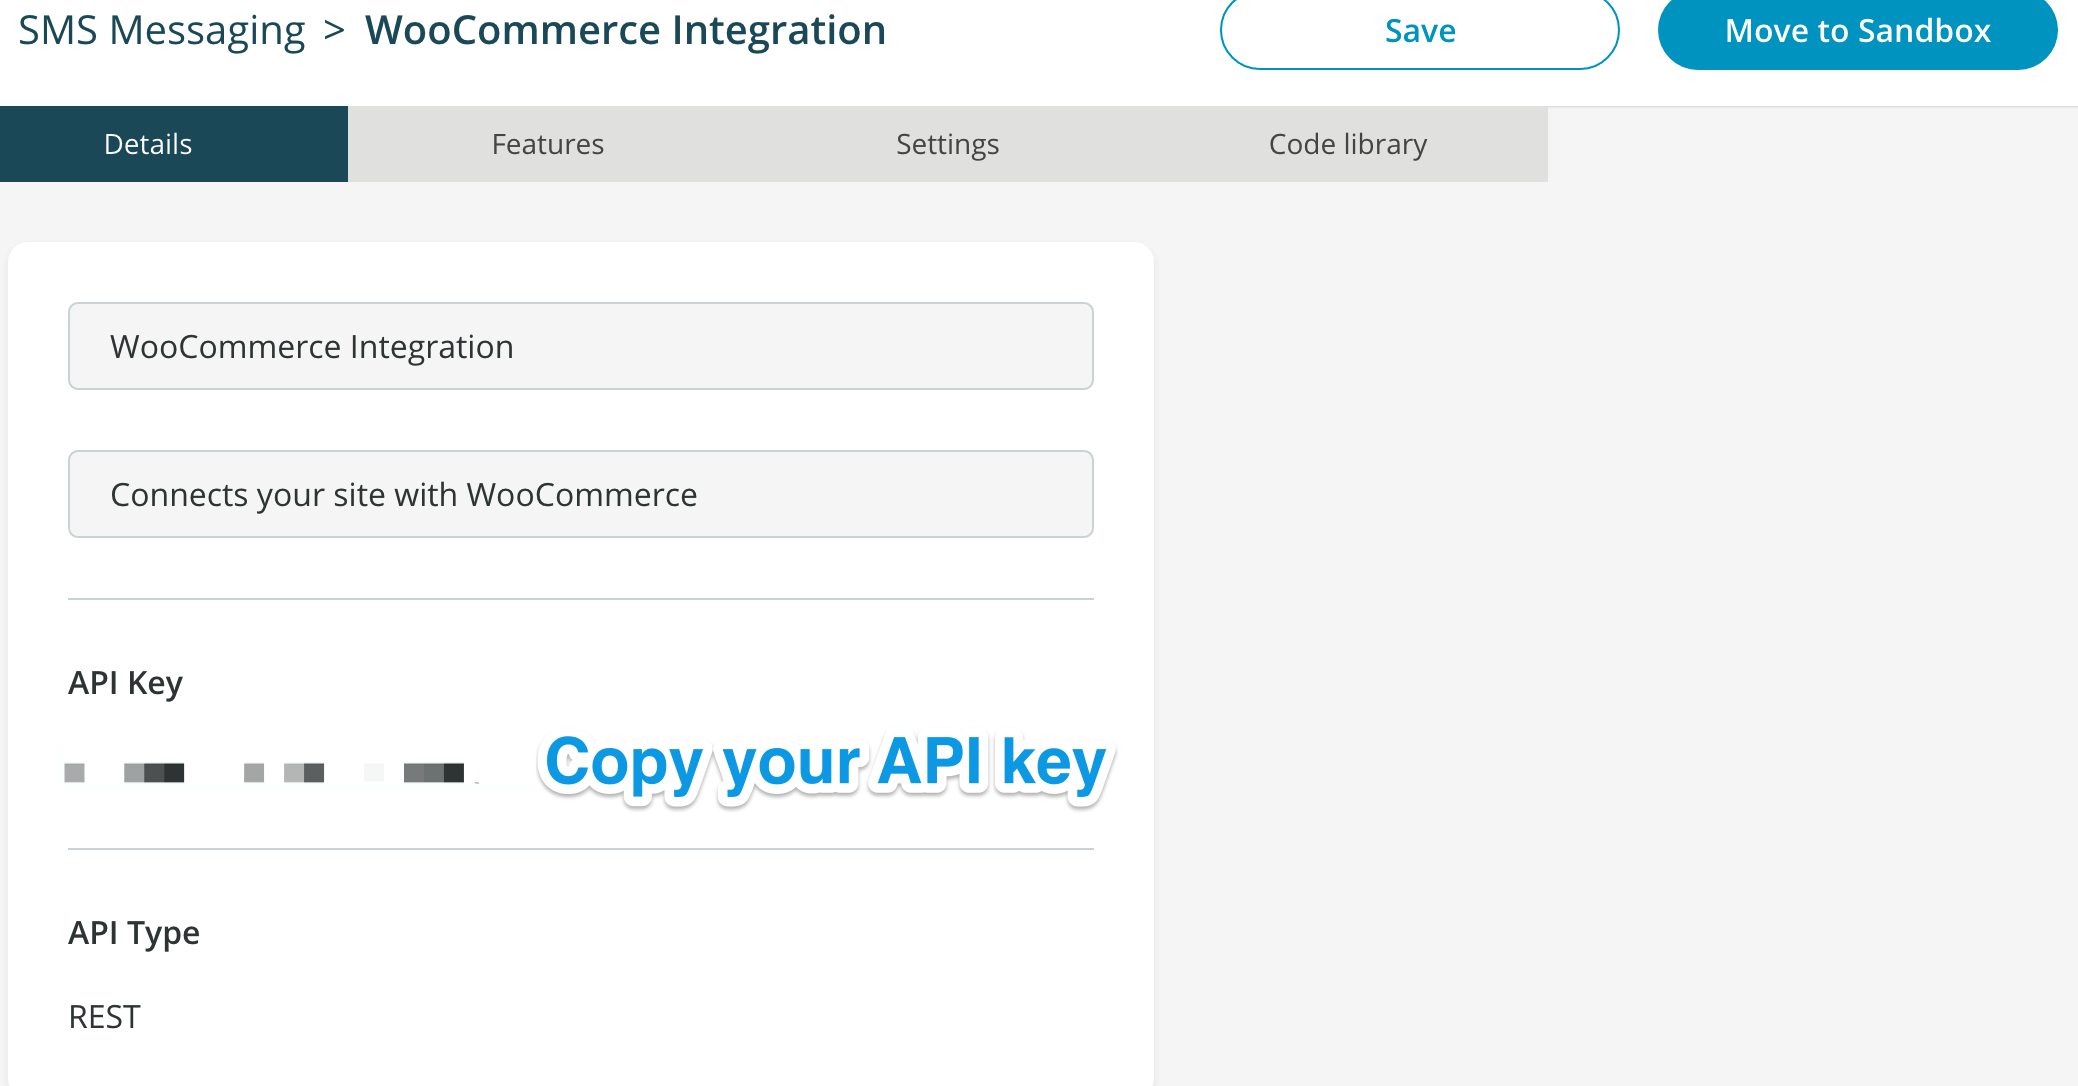
- Add both a name and description for your API key. This is for your own reference, so using something like “WooCommerce Connection” for the name, and then your site’s URL for the description is a good start.
- If you’re installing Clickatell SMS Integration on a test site, choose “Sandbox environment”. If it’s a live/active site, then choose “Production environment”. After you’re done, click next to move on.
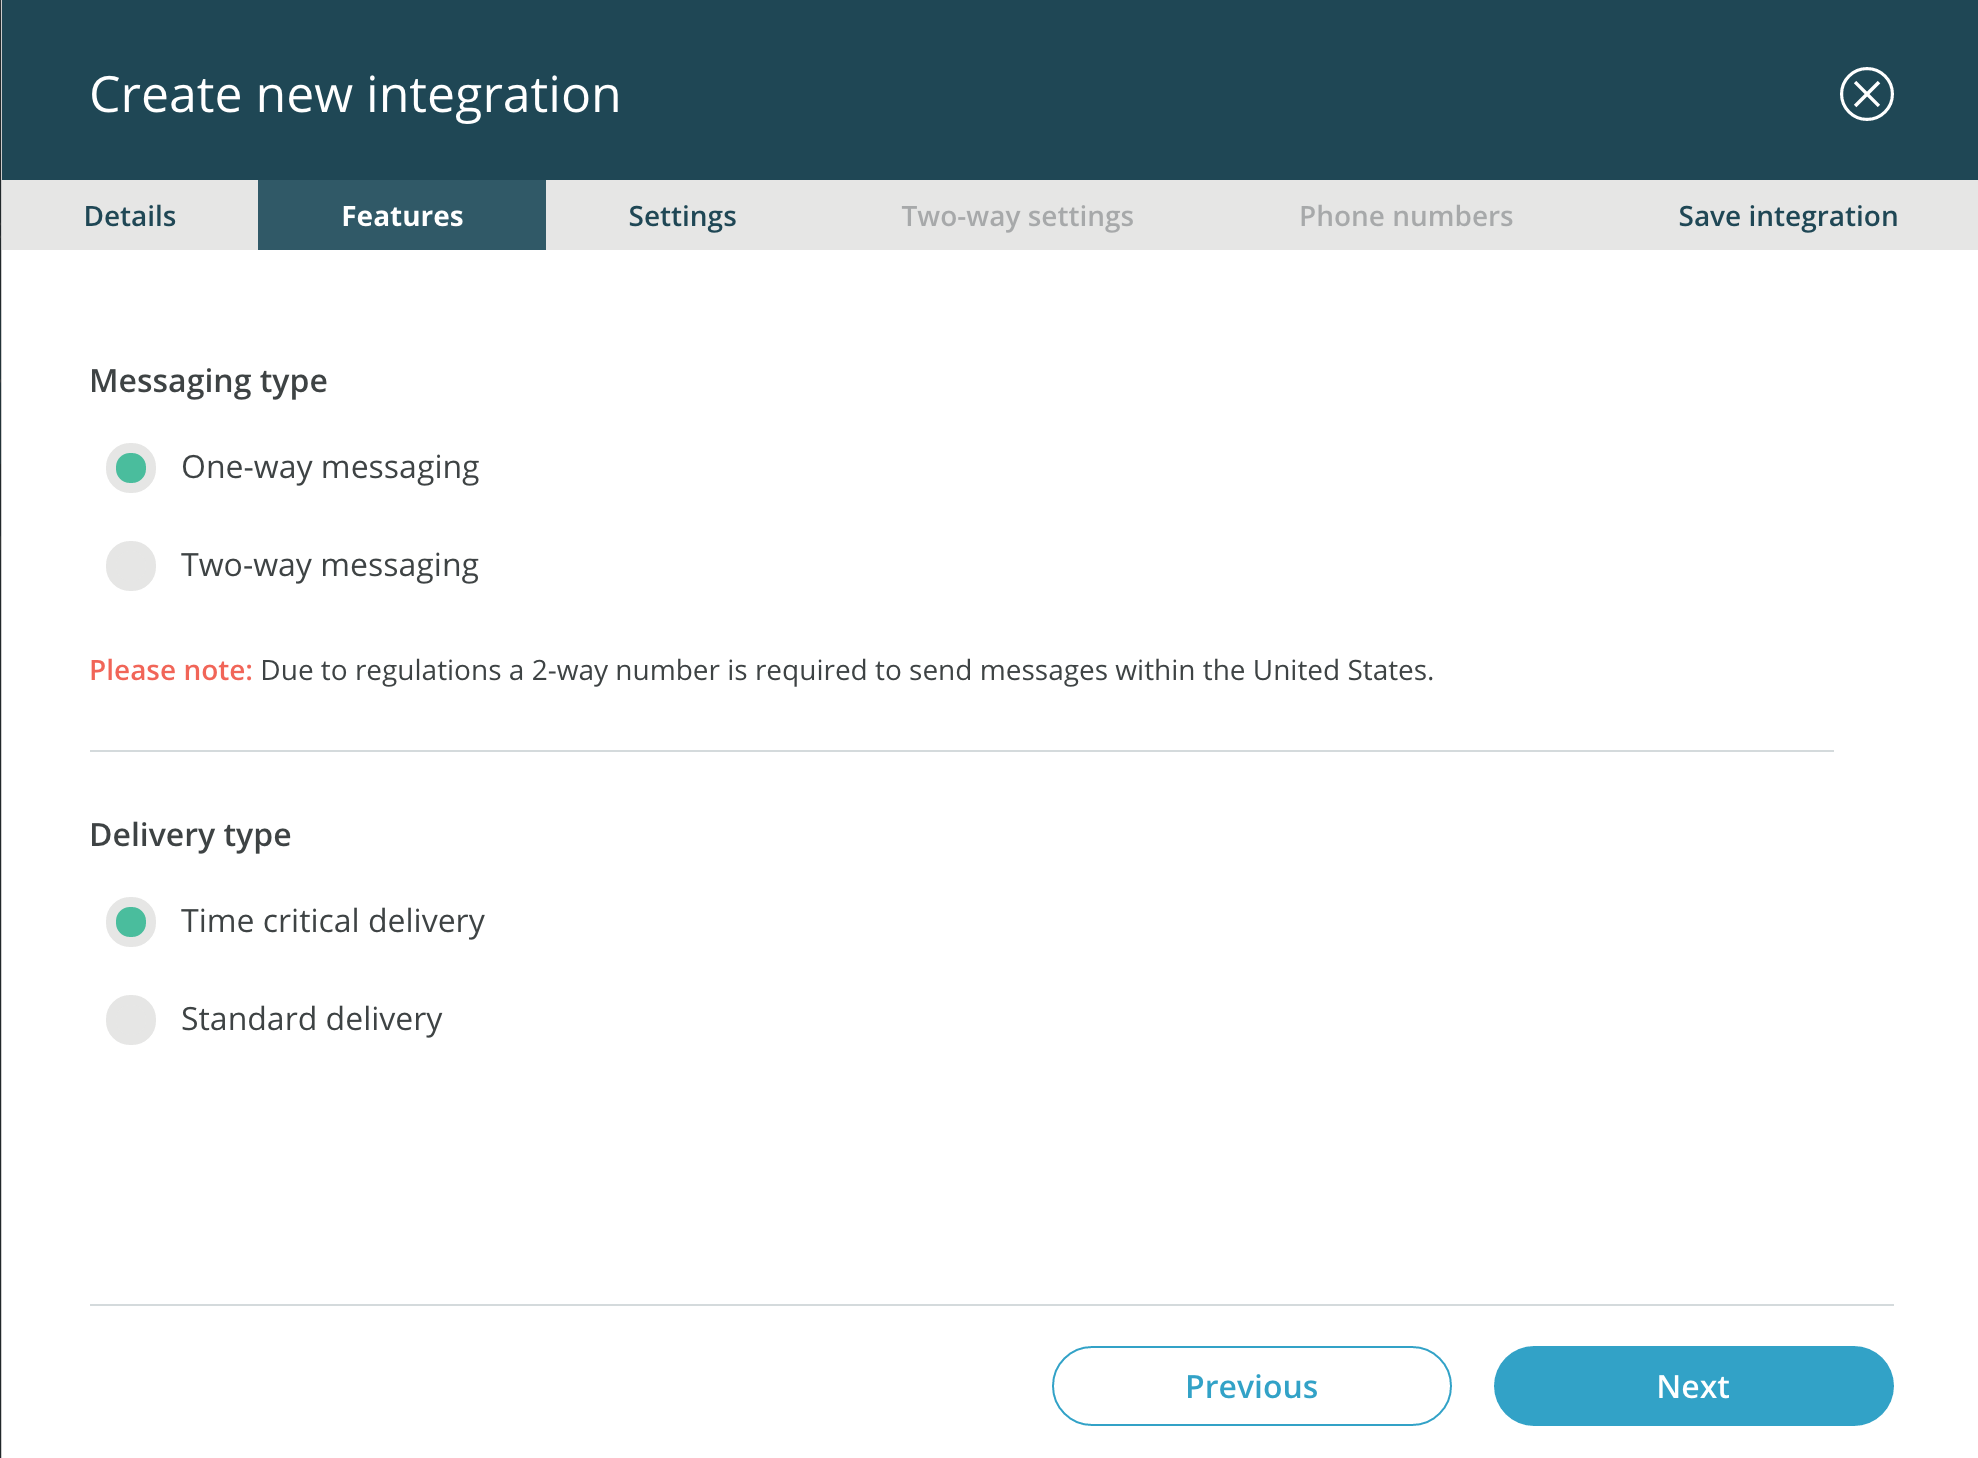
- In the Features tab, choose either one- or two-way messaging. One-way is more typical, but two-way messaging will allow customers to respond to your SMS notifications. For Delivery Type, choose the option that best fits your scenario based off of the Clickatell SMS documentation. Click next to move on.
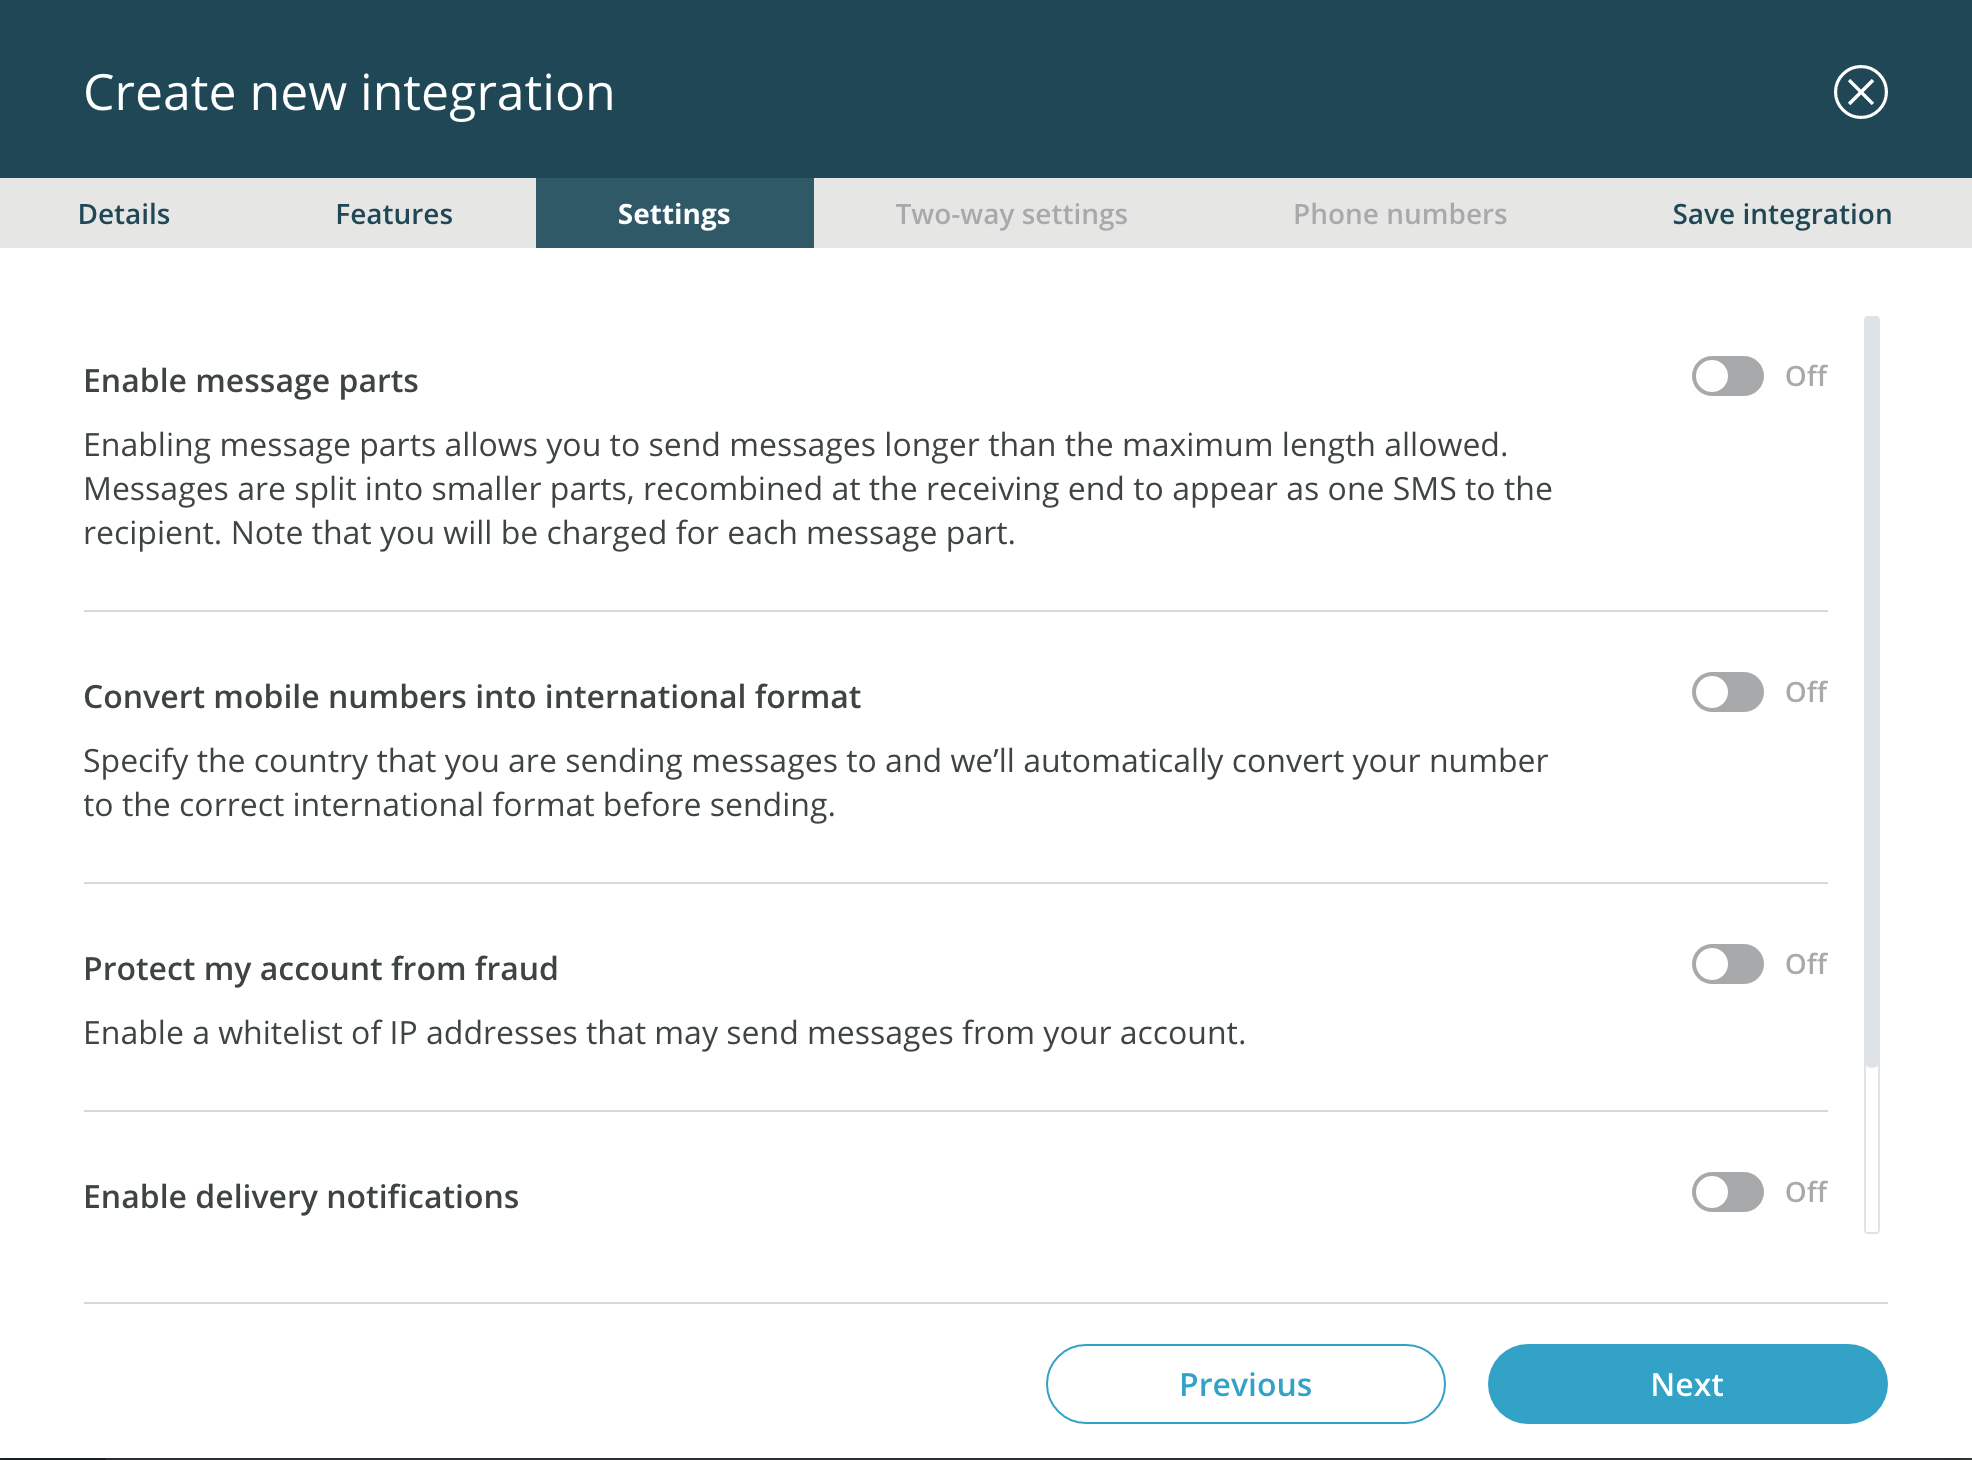
- In the Settings tab, select additional features or options for your API key. These can be added or removed at any time after creation as well. Click next to move on.
- Select the phone number you wish to use. Click next to move on.
- Finally, you’ll see a confirmation screen. Review your features, then click Finish.
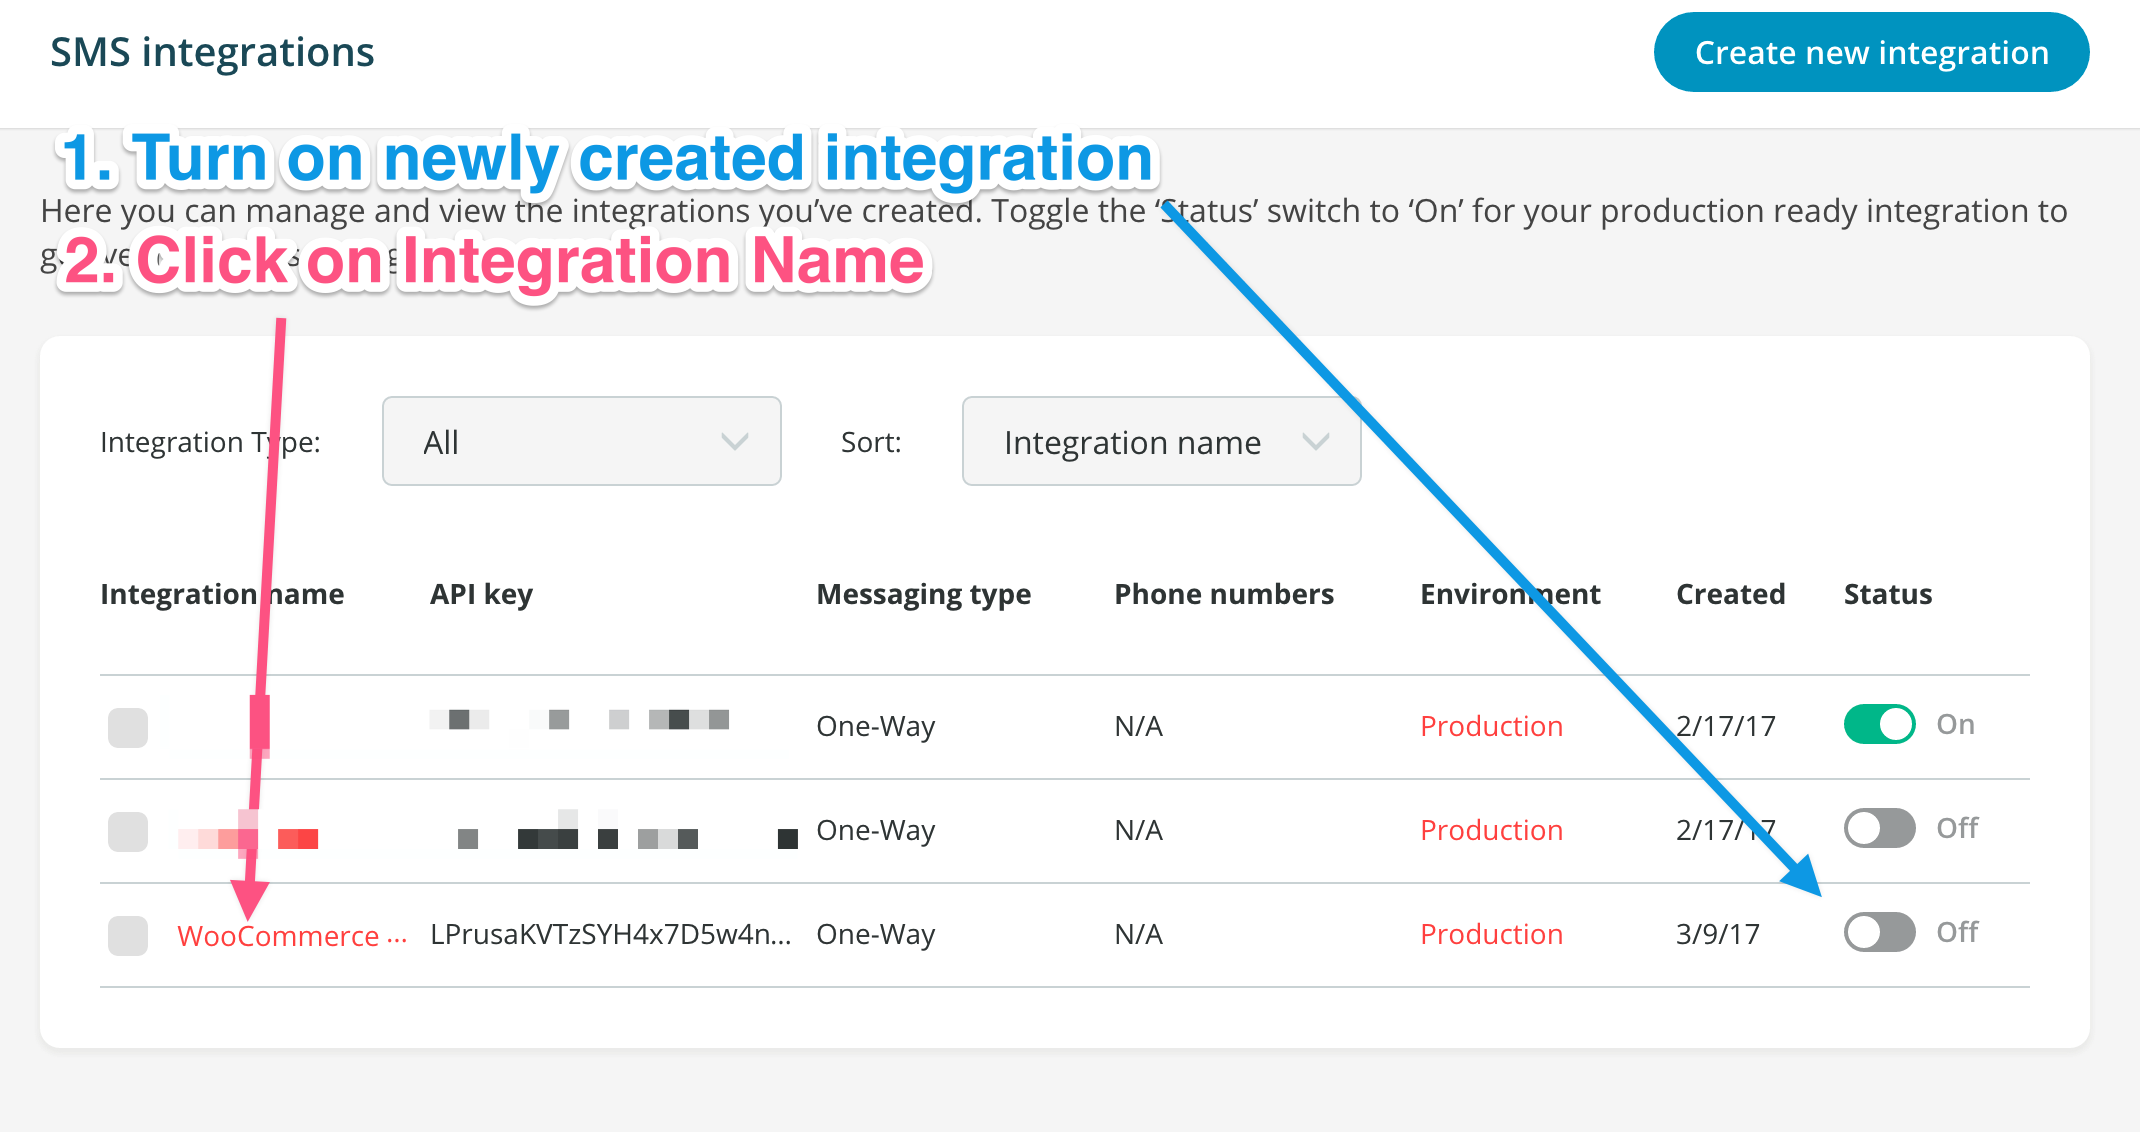
- You will now be taken back to the overview screen
Visual Walkthrough
↑ Back to top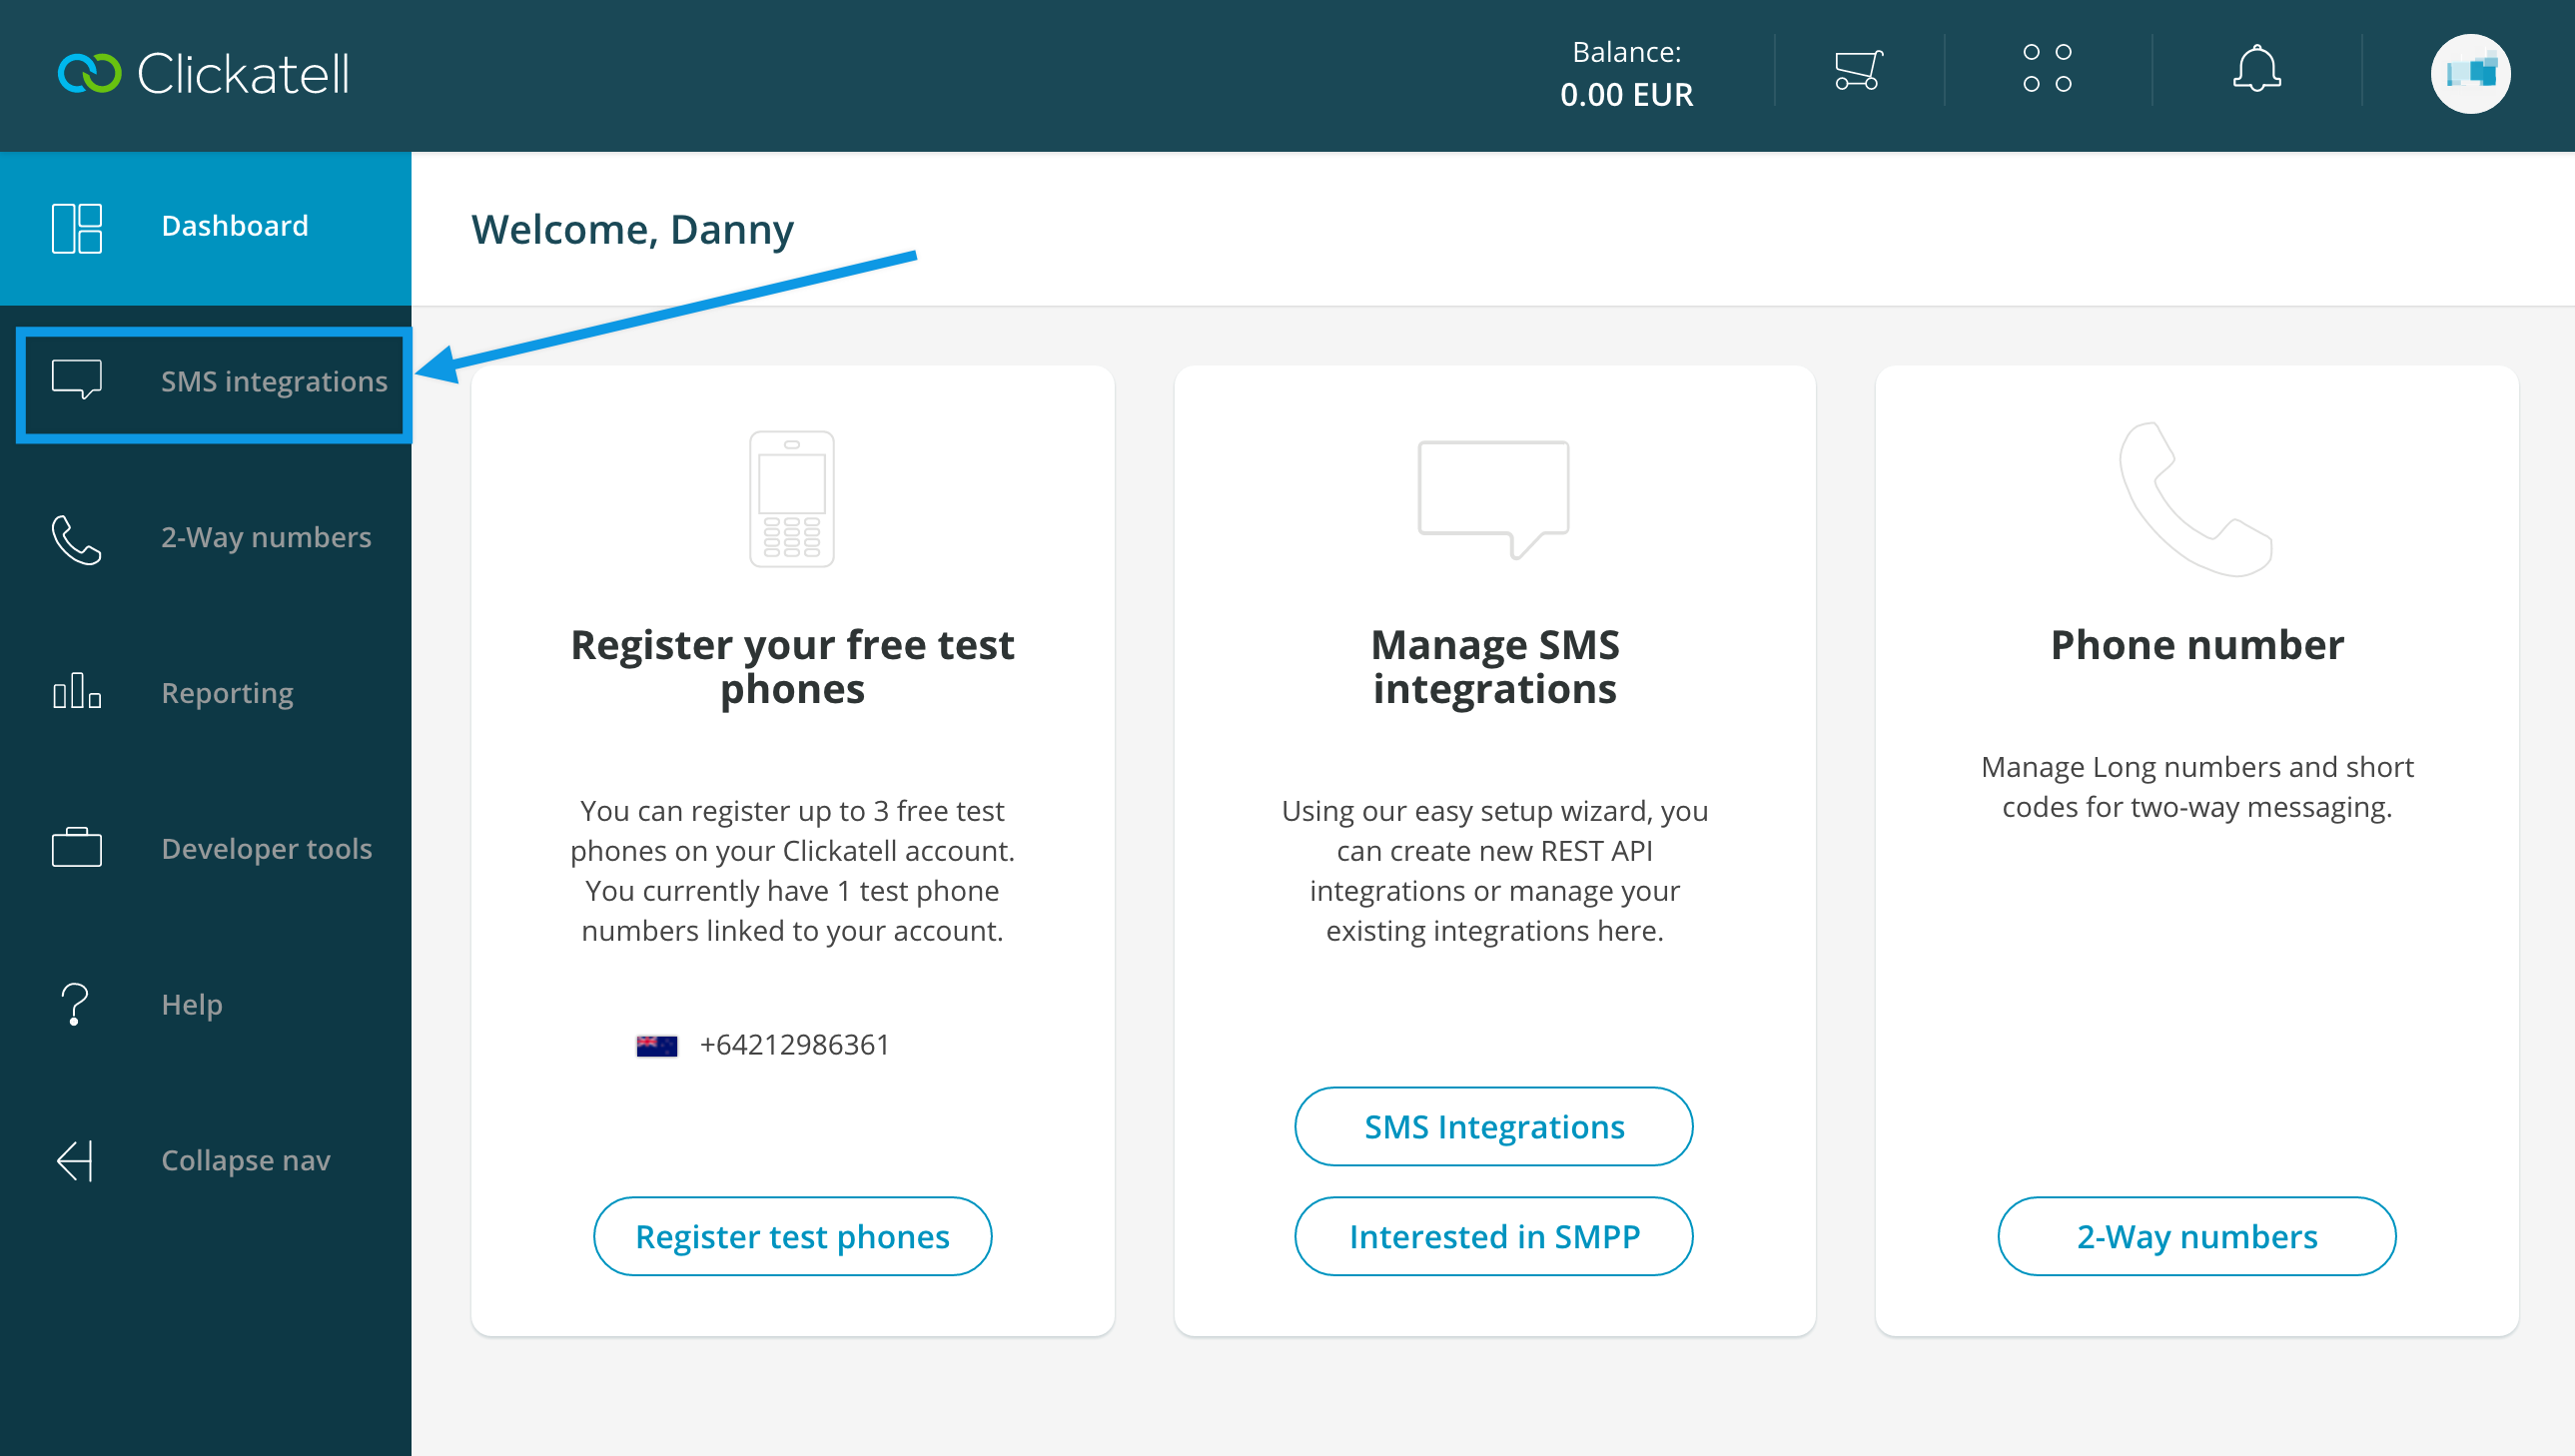

Setup and Configuration
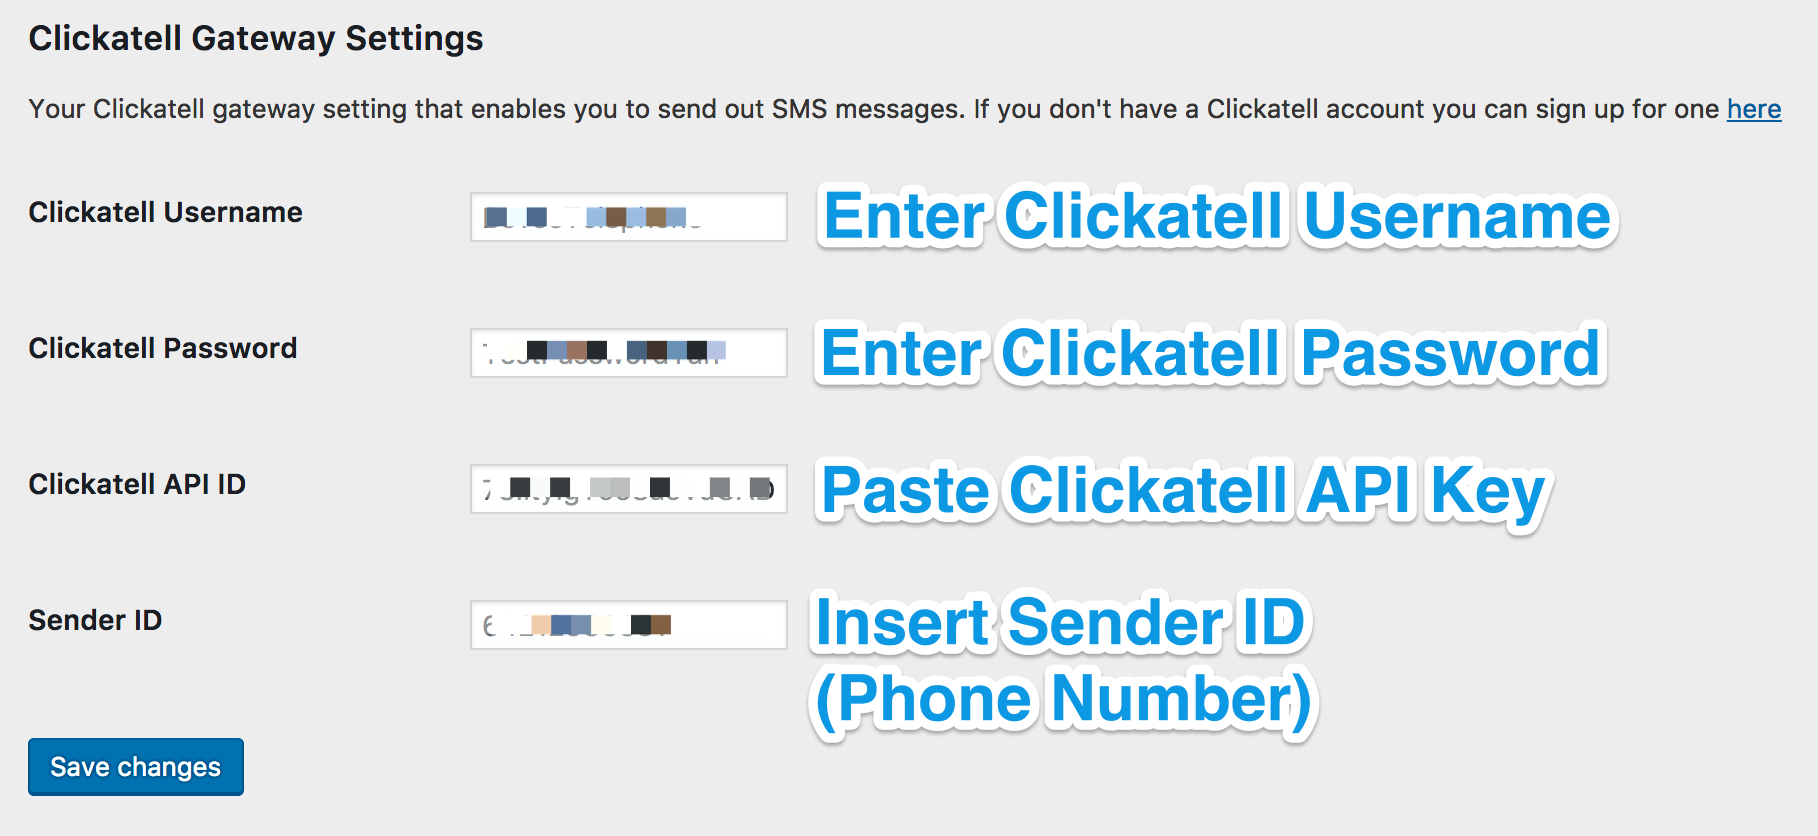
↑ Back to top- Go to SMS Notifications > Gateway Settings.
- Enter your Clickatell Username and Password in the fields – this is the same details you used to log onto the Clickatell website.
- Enter the API ID, the one from the previous instructions.
- Enter your phone number and click Save.
- Go to SMS Notifications > Settings.
- Check the order statuses you would like to have your customers receive SMS notifications on.
- Enter the message your customers will receive when their order status changes, you can personalize this with variables.
- If you would like to enable SMS notifications for your own user when customers place orders, check the New Orders Notifications checkbox.
- Enter a comma separated list of numbers your would like to notify when a new order has been placed.
- Enter the message you would like to send out when a new order is placed, you can use the variables below.
Usage
↑ Back to topWooCommerce SMS Notifications Variables
↑ Back to topTroubleshooting
↑ Back to topHow do I code special characters (Unicode)?
↑ Back to topIf you require the use of special characters (such as Arabic or Russian) in your messages, you need to convert the message to Unicode and add an additional parameter when sending the message (unicode:1 ). Take a look at our Unicode infographic for additional information.