Product categories, tags, and attributes are different ways you can use to organize, display, and filter products in your WooCommerce store. Being technical, you would call these product taxonomies. Though their uses overlap a bit, each one serves a slightly different purpose. In this document we’ll explore these three fundamental taxonomies for organizing and managing your product catalog effectively.
- Categories: Functioning with a hierarchical structure, Categories enable merchants to group their products into broad, navigable sections, simplifying the browsing process for customers. This hierarchical nature allows for the creation of parent and child categories, offering a structured and intuitive way to navigate through products.
- We’ll cover how to add categories, organize them, and add them to your site’s menu
- Tags: In contrast, Tags lack a hierarchical structure and provide a more flexible way of associating products. Tags are useful for applying specific descriptors to products, facilitating the discovery of related items based on shared characteristics, without the need for a rigid organizational framework.
- We’ll cover what tags are, when you might want to use them, and how to add them.
- Attributes: Attributes are crucial for creating variable products. Attributes can also be used to enhance the product filtering and selection process, allowing customers to find and select products that meet their specific preferences or needs.
- We’ll cover the uses of product Attributes, tools for displaying and filtering products by attribute, how to add global attributes that you can use across many products, and how to add custom attributes on a per-product basis.
Product categories
↑ Back to topProduct categories are the primary way to group products with similar features. Categories are hierarchical, meaning they have parent > children relationships. This means you can add subcategories if desired.
For example, if you sell clothing, you might have “shirts”, “hoodies” and “pants” as top-level categories. You could add “short-sleeve” and “long-sleeve” as subcategories of the “shirts” parent category.
Each subcategory can only have one parent, but parents can have multiple subcategories. Subcategories can be nested several layers deep. Generally we recommend to keep things as simple as possible.
How to add/edit product categories
↑ Back to topCategories are managed from the Products > Categories screen.
Similar to categories on your posts in WordPress, you can add, delete, and edit product categories.
To create a new product category:
- Navigate to the the Products > Categories screen.
- In the “Add new category” form, Enter a Name.
- Add a Slug (optional); this is the URL-friendly version of the name. If you don’t enter one, the system will auto-generate one for you based on the category name.
- Choose a Parent category if this will be a subcategory.
- Enter a Description (optional); some themes display this. Most often beneath the category name on the category’s landing page
- Choose the Display type. Decide what is shown on the category’s landing page. Choosing “default” uses your theme’s default. “Subcategories” will display only the subcategories. “Products” only displays products. “Both” will display subcategories then products below that.
- Upload/Add Image (optional); Some themes have pages where product category images are displayed, so this is a good idea.
The Storefront theme by default displays product category images on the homepage template as shown in the screenshot below.

Categories can also be reordered by dragging and dropping – this order is used by default on the front end whenever the categories are listed. This includes both widgets and the category/subcategory views on product pages.
Note: If you have clicked the Name, Description, Slug, or Count table headings to sort the categories by one of those values, drag and drop sorting will not be available.

There will always be a default category. Every product must be assigned to a category, so the default category will be automatically assigned if the product is not assigned to any other category. By default, this category will be named “Uncategorized” and can not be deleted. However, you can rename the category. You can also switch the default category using the Make default row action underneath the category name, then the “Uncategorized” category can be deleted as it is no longer the default.

When you add a new product via the Products > Add Product page, you can select this new product category from the list.
Alternatively, when adding a new product via Products > Add Product you can select Add New Product Category in the Product Categories metabox.

How to add product categories to a site menu (classic theme)
↑ Back to top- On a classic theme, the site menu is managed from Appearance > Menu.
- Similar to pages and custom links, you can add product categories to the site menu.
- From Appearance > Menu in the upper right corner, open the Screen Options menu by clicking the tab. Then select the Product categories checkbox
- With Product categories selected under Screen Options, a Product Categories tab will be added to the menu sidebar which you can use to add product categories to the site menu.

How to add product categories to a site menu (Block theme)
↑ Back to top- On a block theme, the navigation menus are managed from Appearance > Editor
- After opening the site editor, select Navigation and then choose the menu you want to edit.
- Click the pencil icon to edit the menu
- In the editor for the menu, click the plus to add a new link to the menu.
- In the available options, click to Add block
- Then select the Product Category Link block and choose the category to link to.


Product tags
↑ Back to topWhat are product tags?
↑ Back to topEvery product can be filed under one or more Product Tags. This can aid in navigation and allows a more flexible way of associating products. Tags can be used to group and display products with similar aspects.
Contrary to product categories, there is no hierarchy in tags; meaning there are no “subtags.” This makes tags a useful taxonomy for when products have a shared characteristic that stretches across categories.
Here’s an example: Imagine you’re running an online fashion store. You can use tags to highlight the material of clothing items, since clothing in many different categories may be made with the same materials.
For instance, if you sell a variety of clothing items, you might use categories to organize them into ‘Men’s Clothing‘, ‘Women’s Clothing‘, and ‘Children’s Clothing‘. Within these categories, products like shirts, pants, and jackets could be grouped in subcategories. However, to provide more specific details about each item, tags such as ‘Cotton’, ‘Polyester’, ‘Eco-Friendly’, or ‘Water-Resistant’ can be used.
This tagging strategy allows customers who are particularly interested in cotton products, for example, to easily find all cotton items across different categories by simply clicking on the ‘Cotton’ tag. This approach enhances the shopping experience by making it easier for customers to find products that meet their specific needs or preferences, without having to navigate through the entire product catalog.
How to add/edit product tags
↑ Back to topAdding a product tag can be done in two places:
- Create a new tag or edit existing tags from the Products > Tags page.
- Name – assign a name for the tag.
- Slug (optional) – a URL friendly version of the name. A slug will be auto-generated based on the tag name if you don’t enter one.
- Description (optional) – some themes display this. Most often beneath the tag name on the tag’s landing page when someone clicks it.

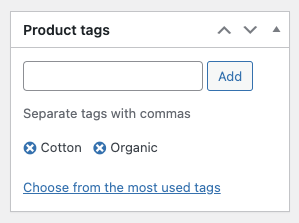
- Create a new tag or add existing tags directly on the Edit Product page using. the Product Tags Metabox.
- Enter your tag’s name and press “Add“.
- Alternatively, choose from the most used product tags on your site by clicking the option at the bottom of the metabox.
Once you’ve added tags to your products, you can check how they appear in your theme by clicking the tag’s name on your product page, or clicking to “View” the tag’s landing page from the Product > Tags page.
Product attributes
↑ Back to topWhat are product attributes?
↑ Back to topA third and important way to group products is to use attributes. Attributes not only assist in the organization and display of products but are also crucial for creating variable products. Each variation is defined by the different attributes you assign it such as color or size. In this way, not only do attributes help define the products themselves, they can enhance the product selection process, allowing customers to find and select products that meet their specific needs or preferences.
Attributes consist of a name, and terms. The terms are the different options that are available for that specific attribute.
For example if the attribute is “Size”, the terms might be “XXL”, “XL”, “L”, “M”, “S”, “XS” etc.
Using product attributes
↑ Back to topThere are two uses of product attributes that are relevant for WooCommerce:
- You can filter and display products based on attributes that you’ve assigned them. In this way you can select a specific attribute and display products that contain it. Or you can use attributes as a filtering mechanism. For example: If you’re selling clothing, two logical attributes are “color” and “size”, so people can search across categories for a color that fits their style and type and clothing available in their size.
- There are legacy options for displaying products by attribute (Widgets and Shortcodes);
- as well as options from the newer WooCommerce Blocks (Filter by attribute block, Products by Attribute Block).

- We also use attributes to define and create variable products. First, add attributes to the product, then use these attributes to define product variations.
- For example, size and color attributes can define the different variations of a shirt product. More info at: Variable Products.

How to add/edit product attributes
↑ Back to topWhen you’re adding attributes for your products, there are two ways you can add them:
- Attributes can be defined globally, so they’re easy to update across the entire store, and available to be used on any product, or;
- Attributes can be defined individually, at the product level, and they will only exist for that single product.
Generally it’s preferable to define attributes globally. Once global attributes are defined, they can be assigned to any products as needed. Global attributes make updates easier as well. Say your marketing team wants to start calling “Blue ” products “Cerulean” instead. You just update the name once in the attributes page, and it’s updated everywhere that attribute was used.
Create global attributes
Adding global attributes sets them up so they can be applied to any product in your store. To add an attribute globally:
- Navigate to Products > Attributes.
- In the “Add new attribute” form, Add a Name.
- Add a Slug; (optional); this is the URL-friendly version of the name.
- Enable Archives if desired.
- If enabled, you can view a page with all products having any term of this attribute. For example, if you have this enabled, and “black” is one of the options under the “color” attribute, you can add
http://yourstore.com/color/black/to your menu to only display items with the “black” attribute.
- If enabled, you can view a page with all products having any term of this attribute. For example, if you have this enabled, and “black” is one of the options under the “color” attribute, you can add
- Select a Default sort order. Choose between:
- “Name”, (sort alphabetically)
- “Name (numeric)”, (if the values are numbers)
- “Term ID” or;
- “Custom ordering” where you decide by dragging and dropping the terms in the list when configuring the terms (see below).
- For variable products, the sorting order of the attributes affects the sorting order of the dropdown selector(s) on the product page.
- Select Add Attribute.


Adding attribute options
Now your attribute is created, you’ll need to add “terms” (aka. options or values) that define the values the attribute can have:

- Once created, the attribute is added in the table on the right, but without values.
- Click “Configure terms” to add attribute values in the “Edit Attribute” page.
- On the “Edit Attribute” page, Fill the form with your attribute’s option’s details:
- Name – The name for this option
- Slug (optional) – a URL-friendly version of the name, if you don’t enter one, a slug will be automatically generated based on the name you enter.
- Description – A description of the value. This isn’t displayed prominently by default, but some themes may show it.
- Next click Add New {Attribute name}, “Attribute name” automatically takes the name you gave the attribute when creating it. (e.g. “Add New Color”)
- Add as many values as you wish. If you selected “Custom ordering” for the attribute’s sort order, reordering your values can be done here.

Add global attributes to product
After your attributes are created and their terms defined, you can add the created attributes to your products:
- Go to: Products > Add Product (or edit an existing one).
- Select the Attributes tab in the Product Data.
- From the “Add Existing” dropdown menu, select the attribute you’ve previously created.
- After adding the attribute to the product, add the relevant values for the attribute:
- You can select existing terms/values one by one by clicking in the. “Values” area.
- Click “Select all” to load all existing values for this attribute to the product at once.
- You can also use the “Create value” button to add new values to the global attribute. These new values will be saved for global reuse.
Note: When adding attribute values to a product using the “Select all” button, they will be added in their sort order. See above for details on the sort order options. The order values are added to the product here is the order they will be displayed on the front end of the site.

Add custom attributes
If you’ll only be using an attribute for one product, you can create and add it to that specific product from the “Attributes” tab on the “Edit Product” page. This would only be ideal if you have a product with unique variations. Attributes created on the product page are not available for global use.
To add a custom attribute to a single product:
- Go to: Product > Add Product.
- Select the Attributes tab in the Product data meta box.
- Click the “Add New” button, a new empty attribute will be added below.
- Give the attribute a name, and add values in the available box. Use the “pipe” symbol to separate values. |
In this way you can quickly add one-off attributes to products that have special characteristics.

Questions and Support
↑ Back to topDo you still have questions and need assistance?
This documentation is about the free, core WooCommerce plugin for which support is provided in our community forums on WordPress.org. Searching there you’ll often find that your question has been asked and answered before.
If you haven’t created a WordPress.org account to use the forums, here’s how.
- If you’re looking to extend the core functionality shown here, we recommend reviewing available extensions in the Woo Marketplace.
- Need ongoing advanced support, or a customization built for WooCommerce? Hire a WooExpert agency.
- Are you a developer building your own WooCommerce integration or extension? Check our Developer Resources.
If you weren’t able to find the information you need, please use the feedback thumbs below to let us know! 🙏